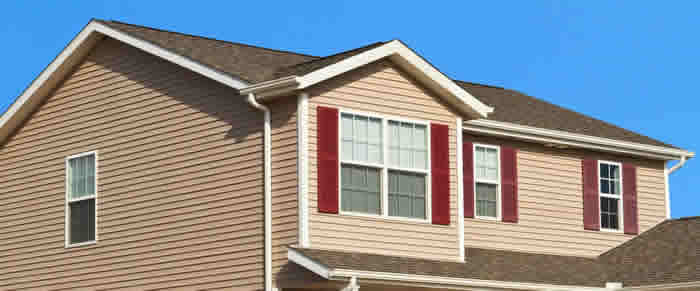
Get the details right when you install vinyl siding and you’ll save yourself hours of frustration later on. These 13 simple tips will help.

Use the Wider Starter Strip
The bottom of the starter strip (the part the bottom panel hooks on to) should be at least 1 in. below the top of the foundation, but the lower the siding is installed, the better. It protects the sheathing from rain, snow and pests. Most suppliers sell two sizes of starter, 2-1/2 in. and 3-1/2 in. Spend the extra few bucks on the wider stuff and start your siding a bit lower.
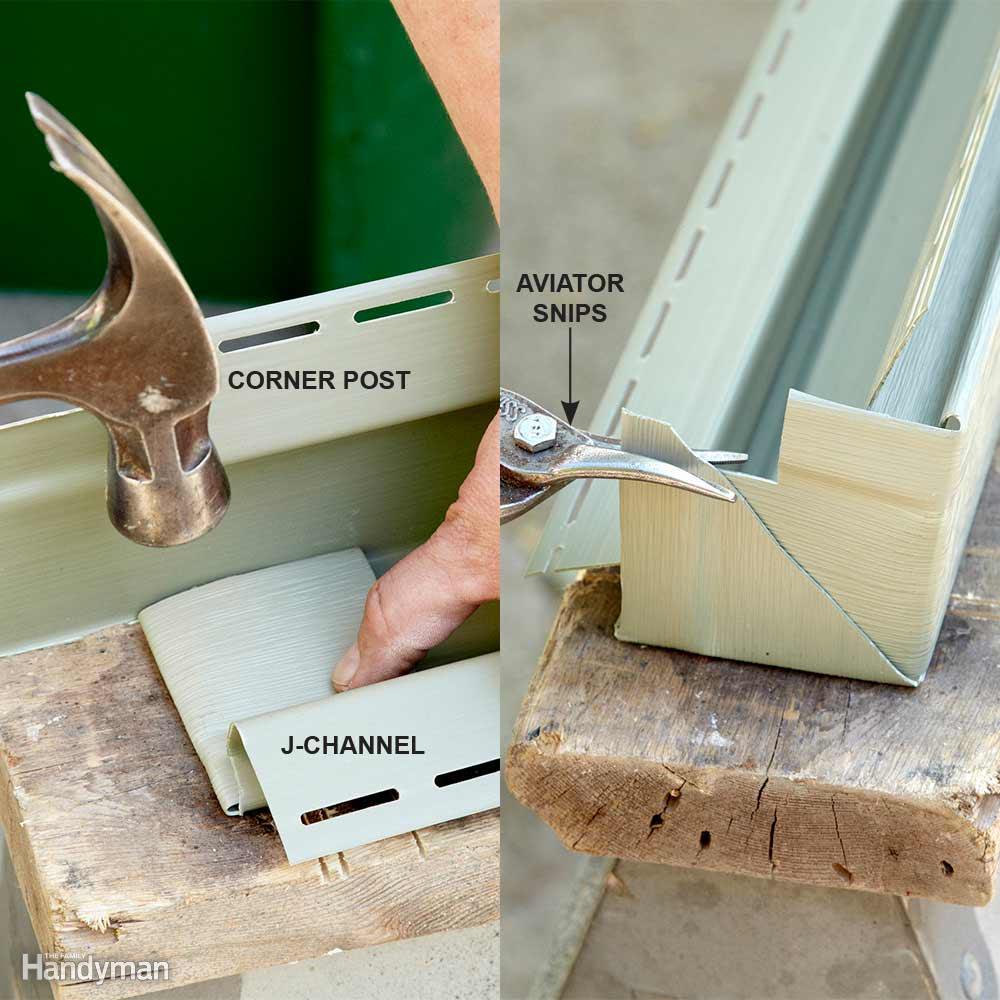
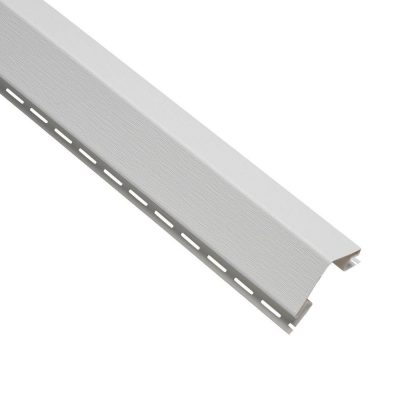
Cap the Corner Posts
Mice, bees and all sorts of other critters love making their home inside vinyl corner posts. Keep these pests out by capping each post before you install it. Start by cutting off a few inches of the J-channel portion on the post. Fold back the remaining flaps and gently tap a crease into them with your hammer. Notch the flaps so the post will fit snug up against the wall. The posts will crack if they’re not warm, so if it’s cold outside, lay them in the sun or bring them into the house before you do this.
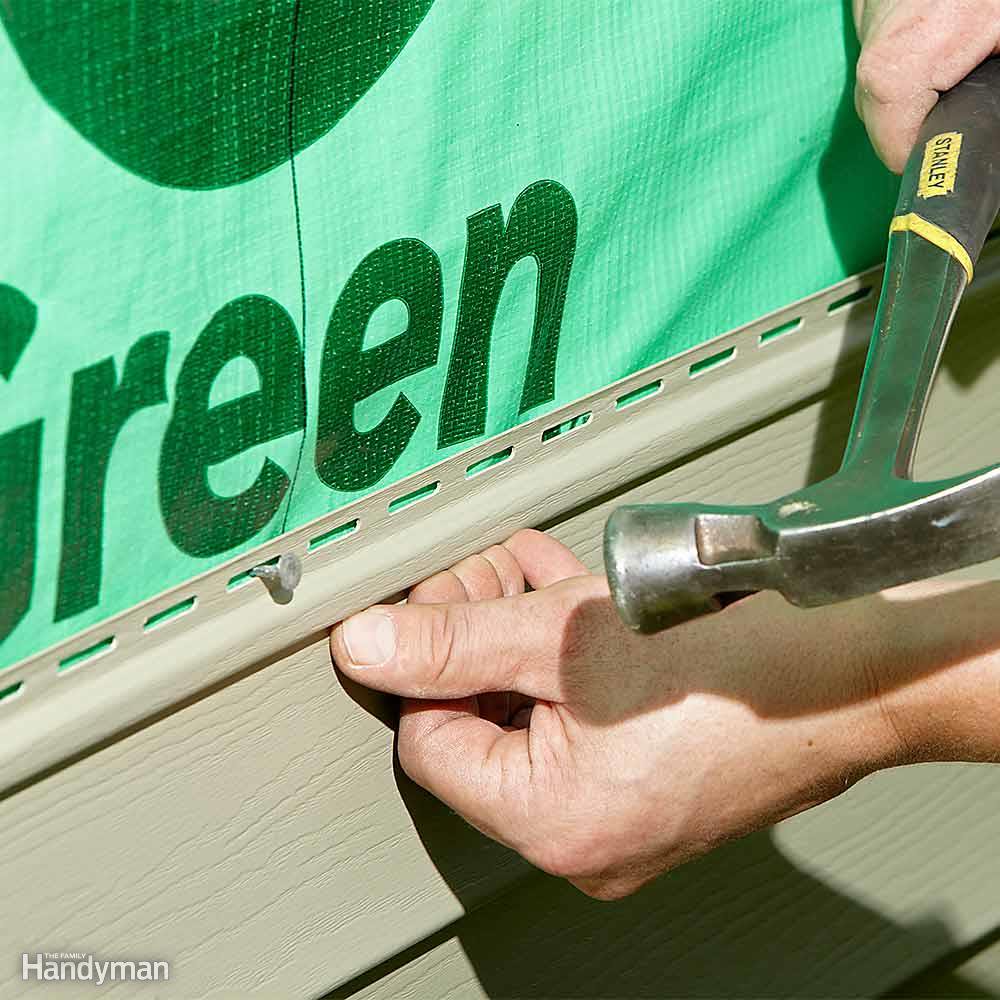
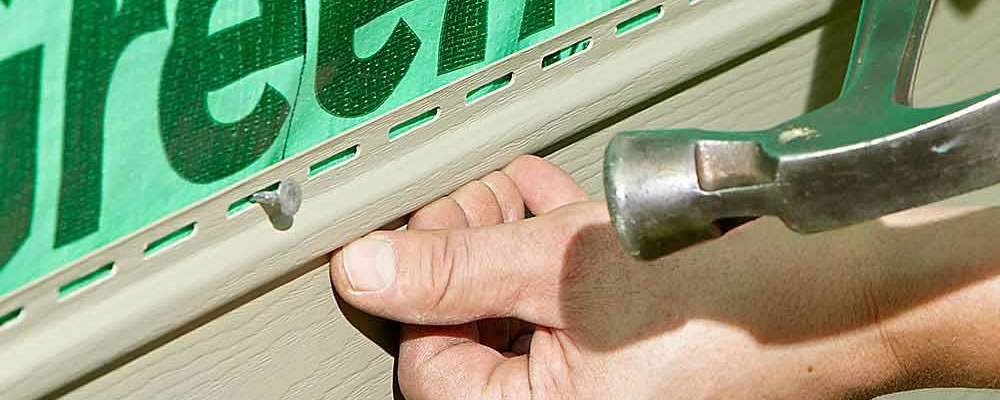
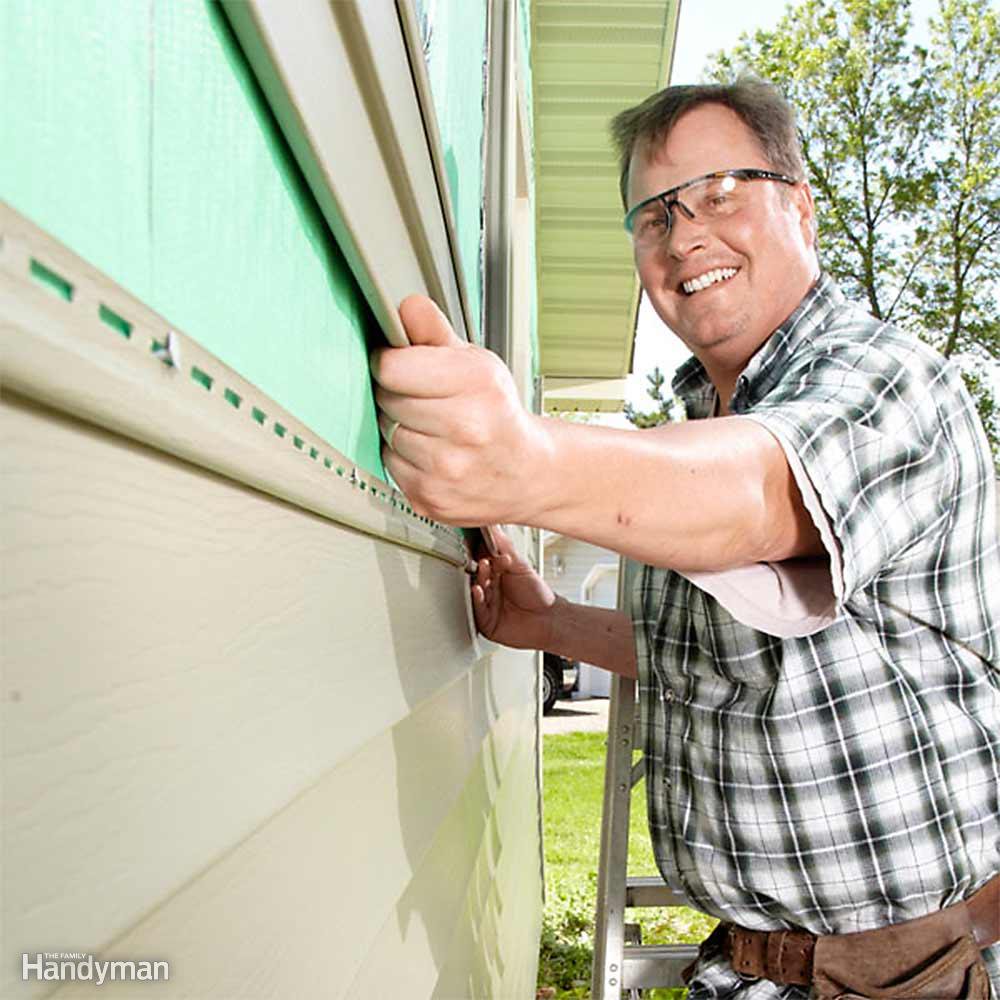
Pull Up as You Nail
Most vinyl siding failures are caused when panels unlock from each other. Once this happens, it’s only a matter of time before the wind catches them and sends them flying into the neighbor’s yard. Always apply a little upward pressure as you nail each piece; this keeps the panels locked together nice and tight. Don’t “power-lift” each piece or you’ll put too much pressure on the nailing flange, causing it to break.
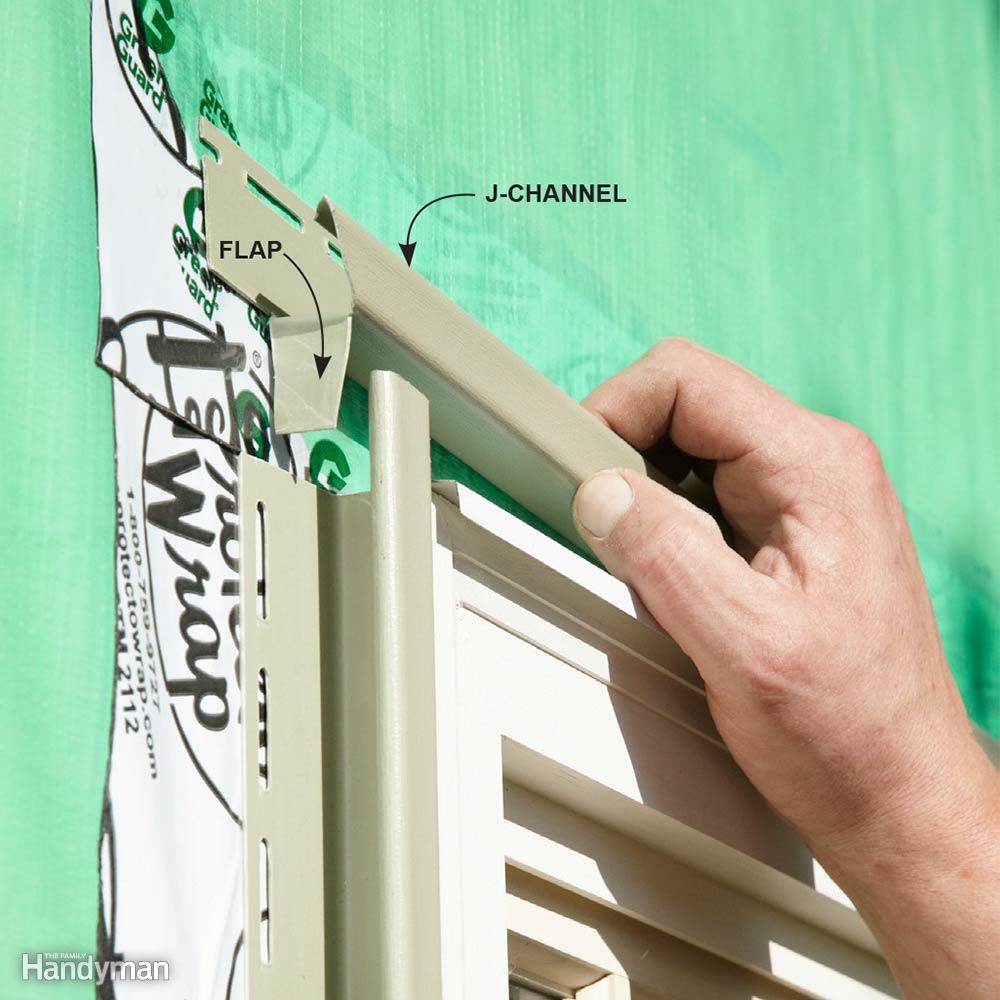
Overlap Your Top J-Channels
There’s no way to stop rainwater from getting into the J-channel that sits on the top of windows and doors. But you can stop that water from getting behind the side J-channels. Create a flap in the top J-channel that overlaps the side channels.
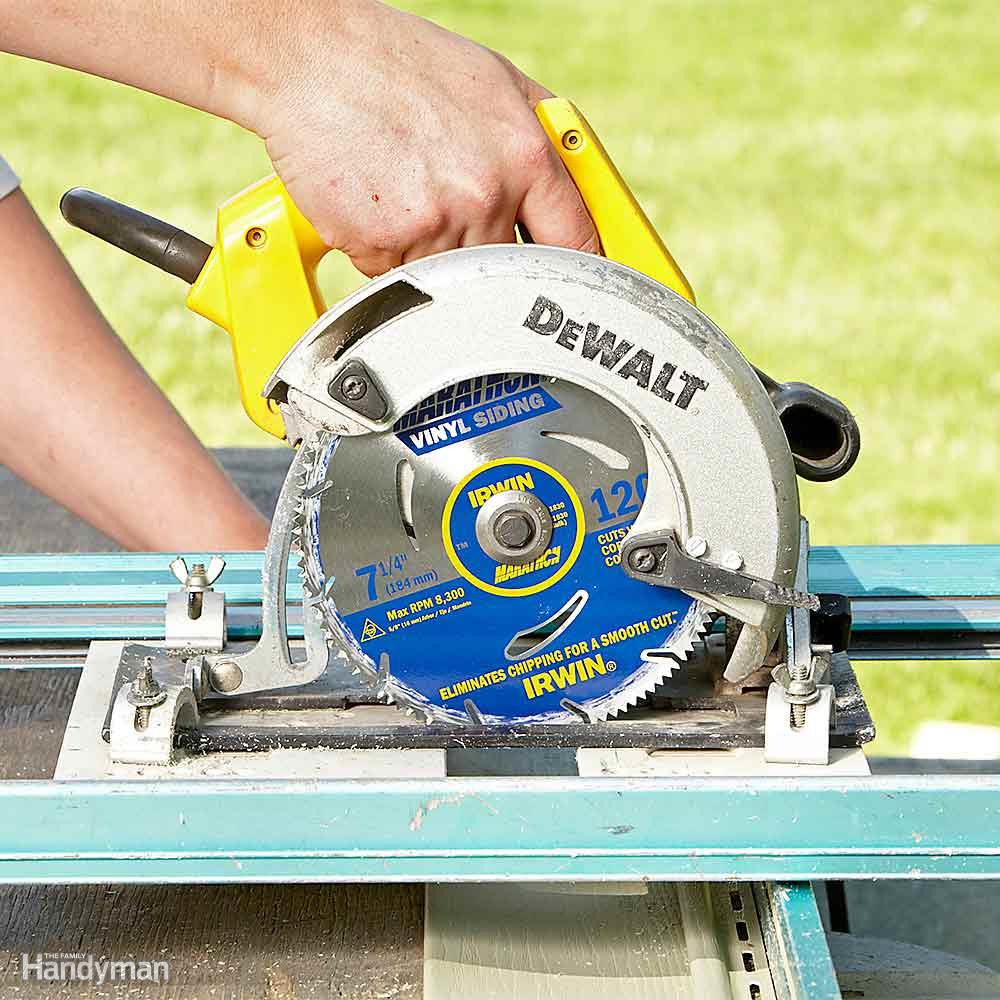
Buy a Vinyl-Siding Blade
Pushing through vinyl siding with a wood blade in your circular saw will cause the siding to shatter, which is both frustrating and dangerous. Buy a blade made to cut vinyl siding. They’re cheap and available at any home center. If you’re using a sliding miter saw, and the siding is still chipping, try slowly pulling the saw backward through the siding.
Nailing Fundamentals
Use 2-in. galvanized roofing nails unless the sheathing has foam on it. Then you’ll want longer ones. Don’t drive the nails tight: Each panel should be able to move back and forth or the siding will bubble on really hot days. Hit every stud: Expansion and contraction of the siding will loosen nails that are fastened only to the sheathing.
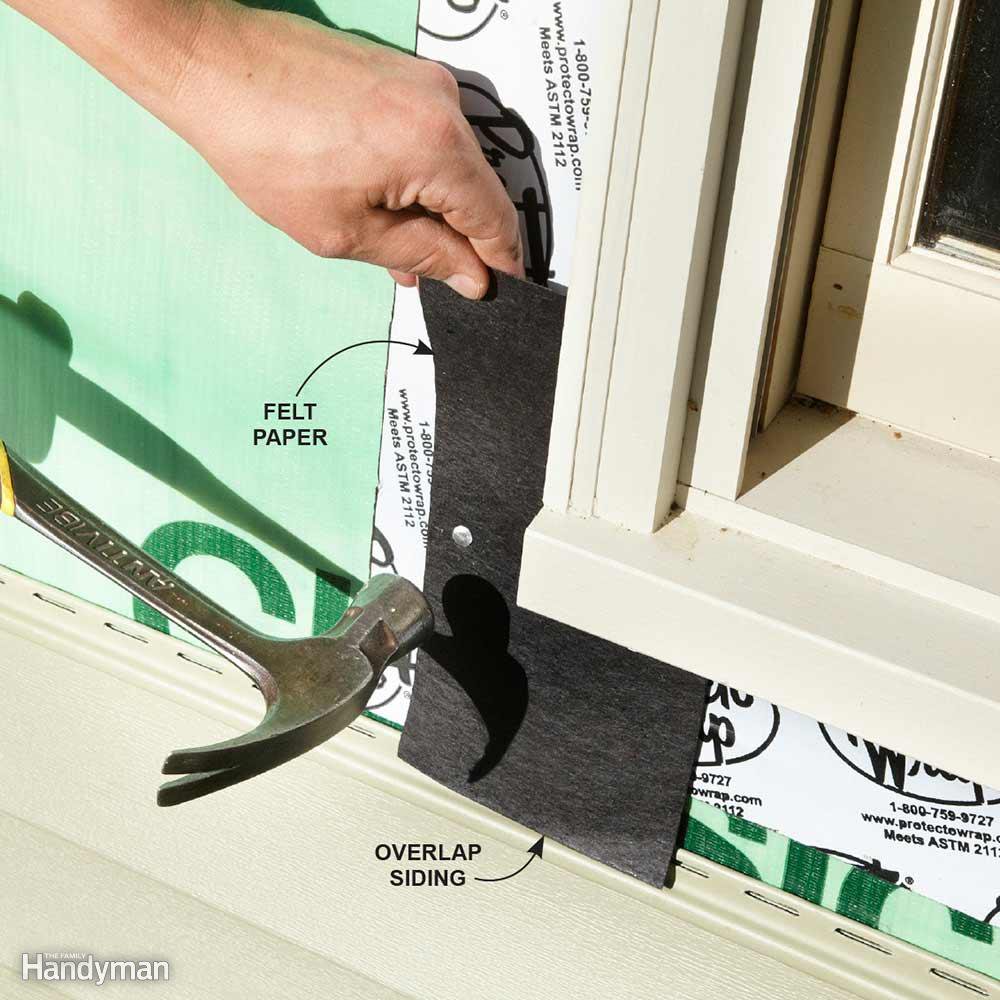
Flash the Bottoms of Windows
Cut a piece of flashing out of felt paper and install it at the bottom corners of the windows before you install the side J-channels. Overlap the flashing onto the row of siding just below the window. Now, any water that runs inside the J-channels will come out on top of the siding and out the weep holes designed for this purpose.
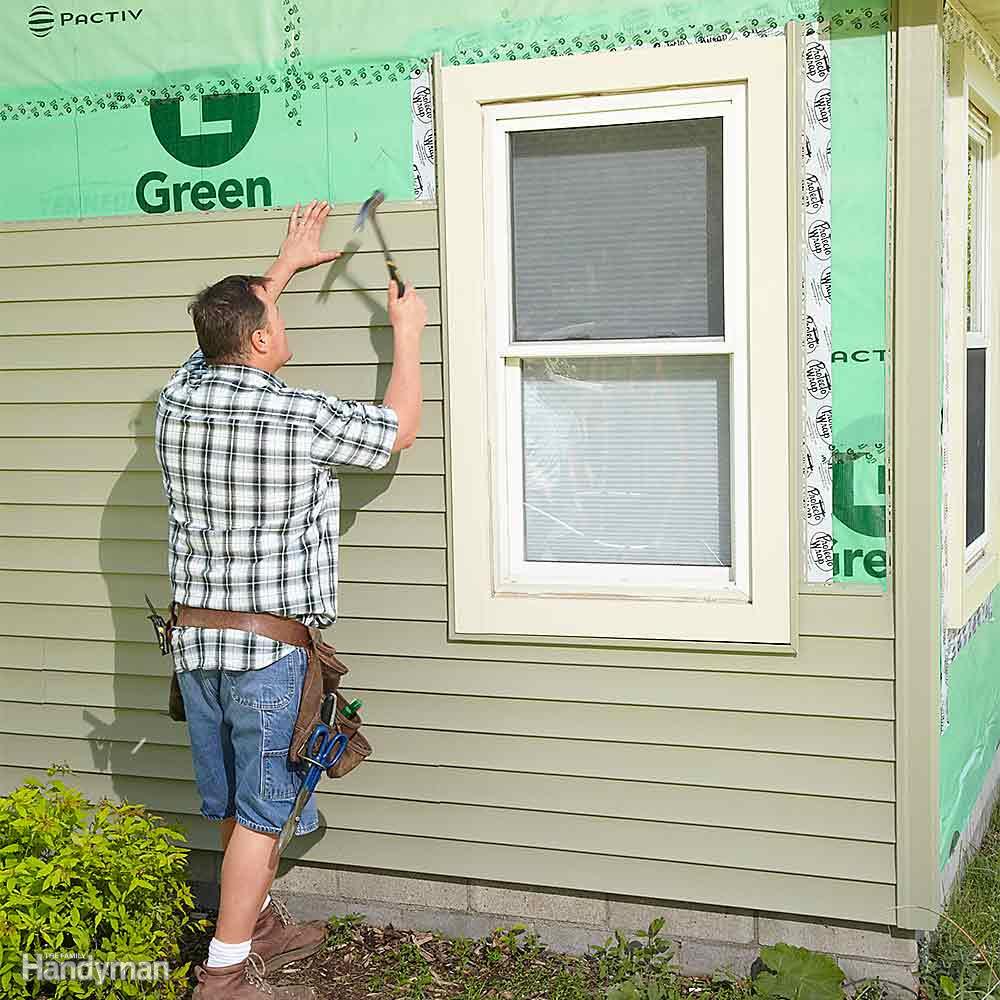
Install Longer Panels First
When installing siding on each side of a window or door, start on the side that needs the longer panels. Longer siding panels don’t stretch as readily as smaller ones, so they’re not as easy to adjust if they get out of whack. Before nailing the last couple of pieces on the small side, measure up to the top of the window to make sure both sides are at the same height.
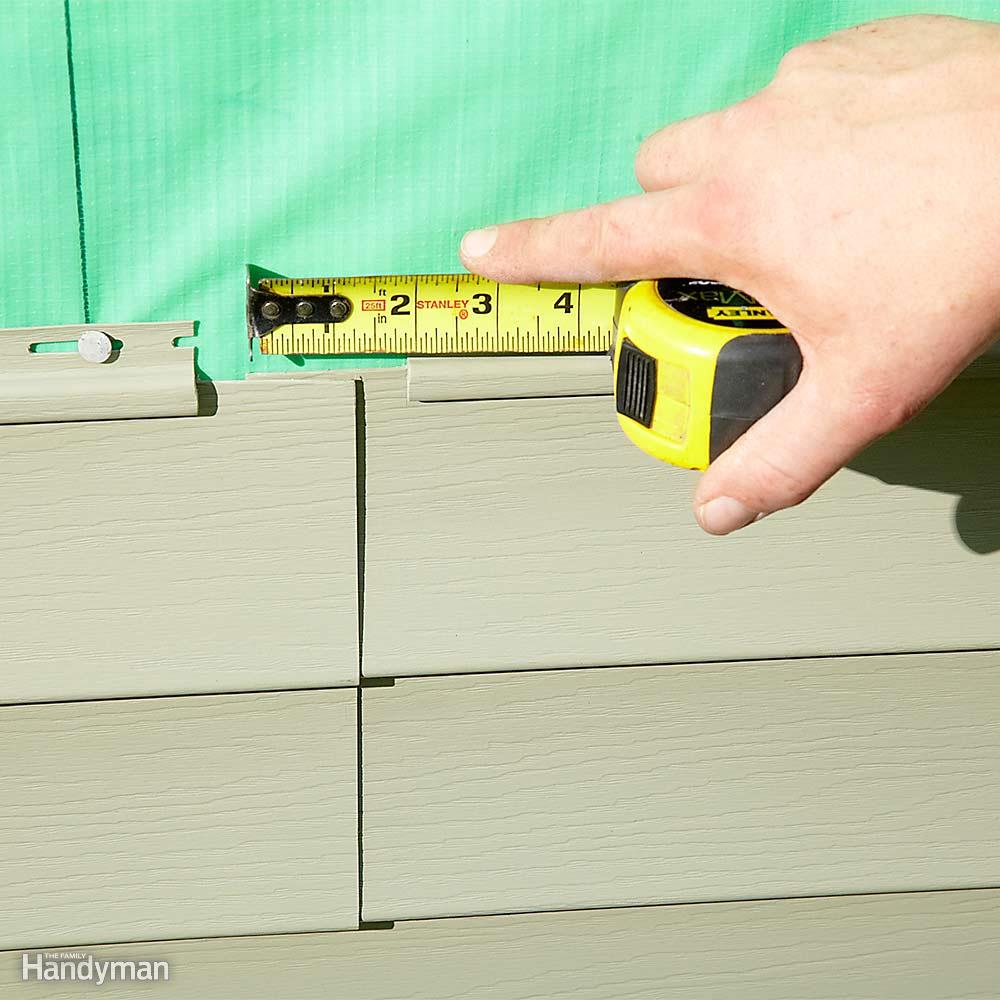
Mind the Overlaps
Always refer to the installation guide on the particular siding that you’re installing, but most vinyl siding panels should overlap each other by at least an inch. Add 3/8 in. on hot days because the siding will contract when the temperature drops.
On the sides of the house, start each row at the back corner so you don’t see the seams from the street. If the seams overlap away from the line of sight, they become nearly invisible. Lap them the other way and they’ll be a real eyesore.
On the front and back of the house, overlap the seams so you don’t see them from the areas where you spend the most time, like front doors, decks and patios. If the visibility of a seam doesn’t matter at all, install the siding so the prevailing winds will blow over the seams, not into them.

Don’t Trap Water Behind Corners
Corner posts above the roof-line are a notorious source of water infiltration. If a corner post is installed tight to the shingles and the J-channel dead-ends into it, any water that runs down the J-channel will back up at the post and may find its way into the house. Instead, hold the corner post up a bit and run the J-channel beneath it.
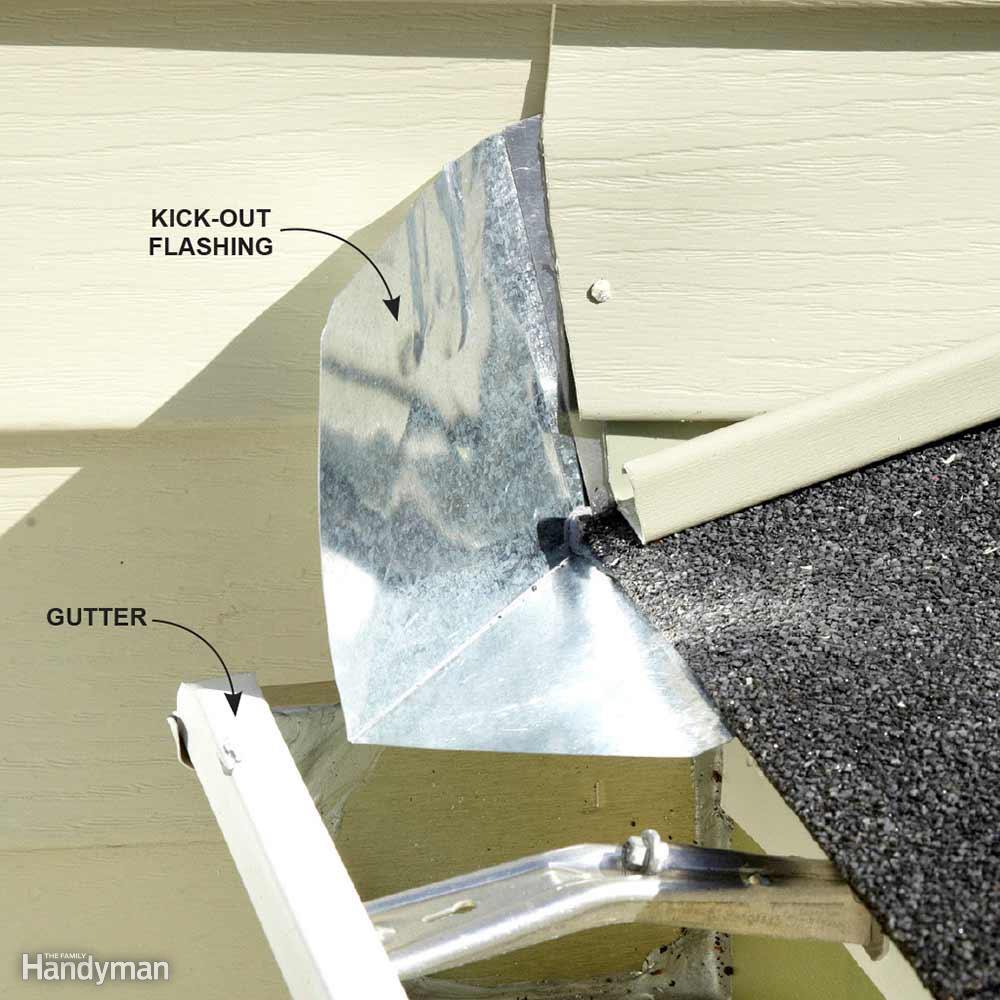
Install Kick-Out Flashing
Kick-out flashing prevents water from running down a roof and ending up behind the siding on an adjacent wall. It can be a pain to side around it, but you will fail your inspection if the inspector doesn’t see it on your job. Leave the kick-out flashing loose and slide the first panel behind the flashing. Then nail the flashing to the wall and lap the next piece over it. You may need a small trim nail to hold the siding seam tight (a little dab of caulk over the trim nail is a good idea).
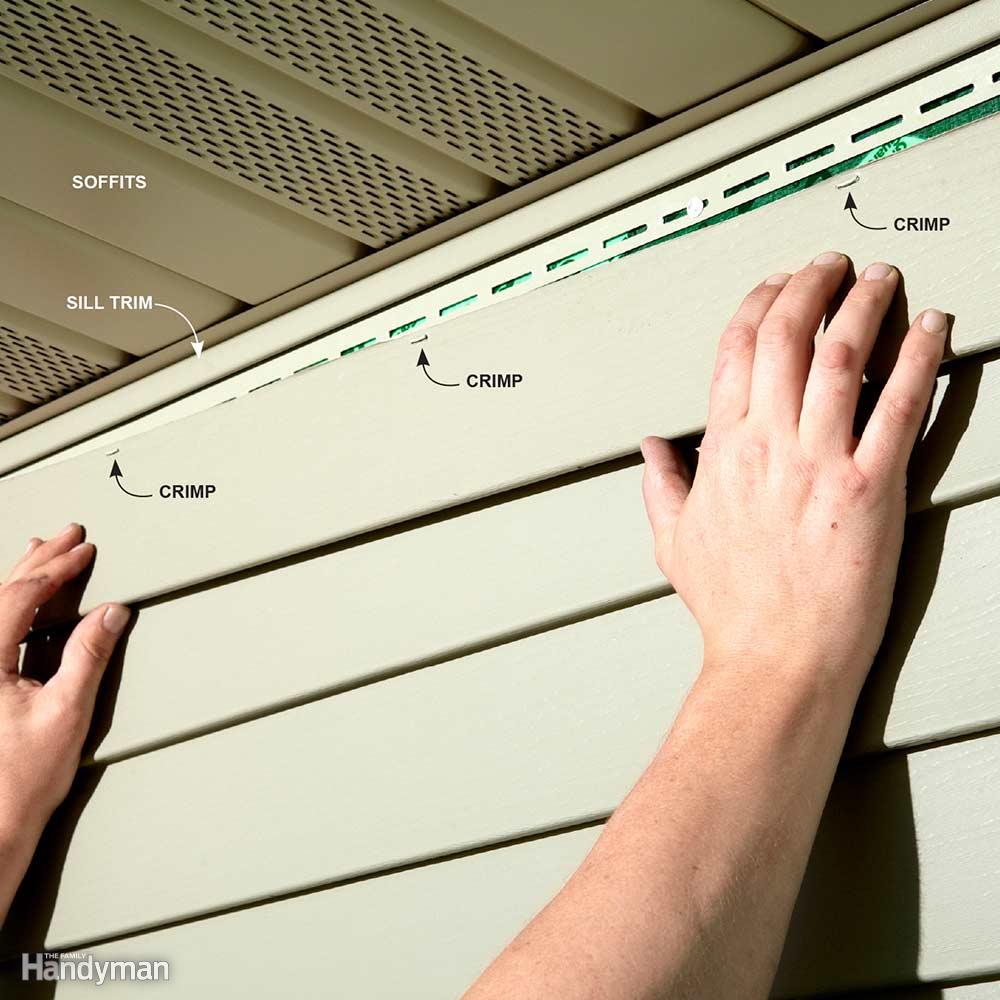
Crimp and Caulk the Top Course
Pay close attention to the area where the top row of siding meets the soffits. The most common approach here is to install sill trim at the soffits, rip down the top course of siding, and crimp the siding so the sill trim holds it in place. This works fine most of the time, but always add a few blobs of caulking inside the bottom lip of the top course for extra security. You can crimp the siding using a Malco Snap Lock Punch.
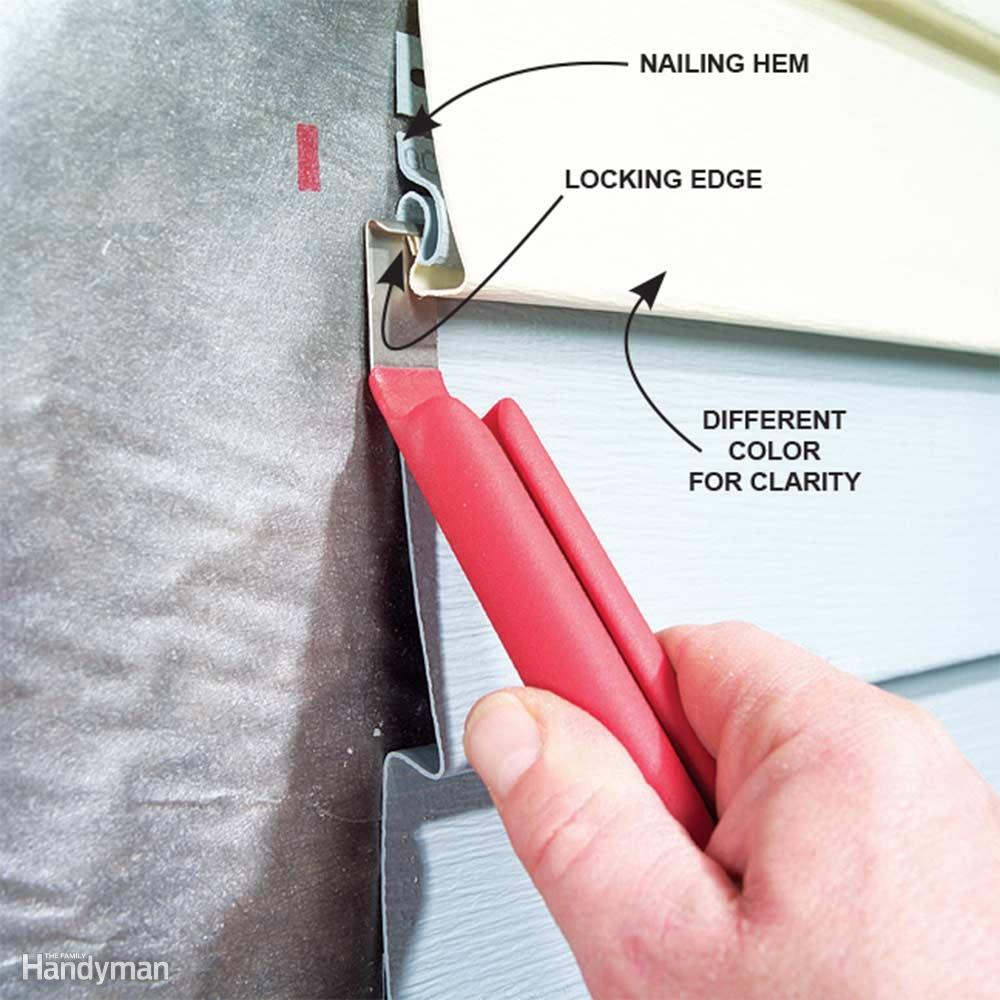
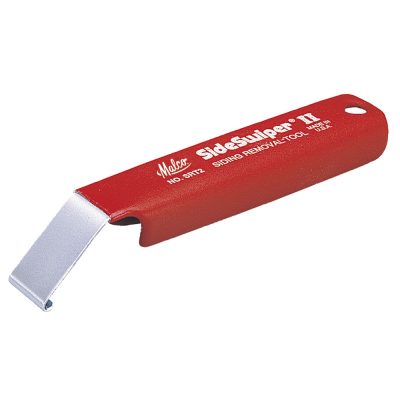
Fix Mistakes With a Zip Tool
To remove a piece of siding that’s already nailed up, slide the zip tool (available at any home center) under the butt edge of the siding, hook the locking edge and pull down. Then slide the tool horizontally along the lock to release it. Lift the unlocked siding to expose the nailing hem of the siding piece below. Draw a line on the wall along the top of each siding course before you pull the nails.
Source: https://www.familyhandyman.com
![]()


Wow, I never knew that mice like living in vinyl corner posts! I will have to keep that in mind when we decide to remodel our home because my husband is absolutely terrified of mice. In my opinion, I think that anyone thinking about remodeling should talk to a professional to be able to avoid things like pests or leaks in the future.
They don’t live in it really, they climb up it and into the soffit and find a way into the attic/house. Pest control guy told me to put lots of steel wool up the corners since they can’t chew through that. This helps keep them from doing that.
its crazy when we started our business we didnt know a lot of this. thank you for sharing, i now have somewhere to send my clients to learn from! https://www.paylessforwindows.com/