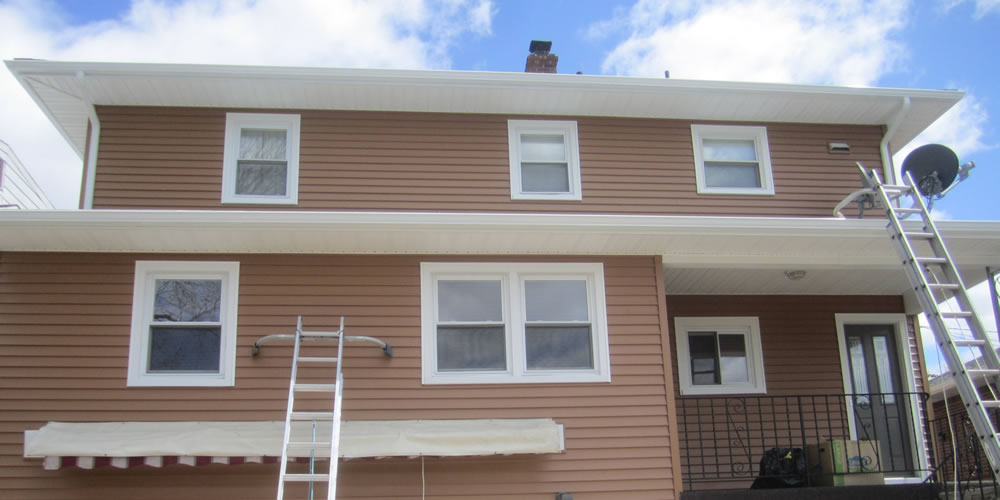
You probably don’t spend much time thinking about as you go about your busy days. But when you notice that your home or business is projecting an unkempt, run-down appearance, or your interior suddenly feels like it might have become one with the exterior, you’ll be amazed at how quickly it can find its way to the top of your mind.
Never fear—if you’re in desperate need of some siding savvy, this article offers guidance to help you make the wisest investment possible in the longevity, curb appeal, and value of your property. From basic vinyl to fiber cement, wood, and even metal cladding options, here’s a rundown of what you should know.
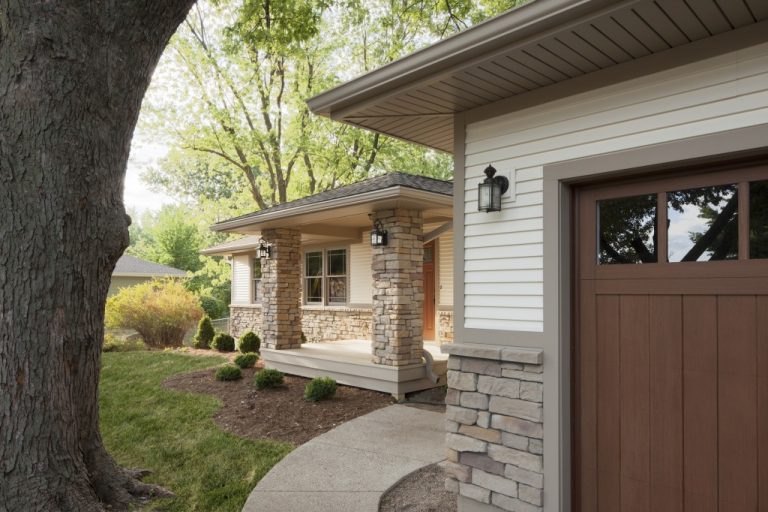
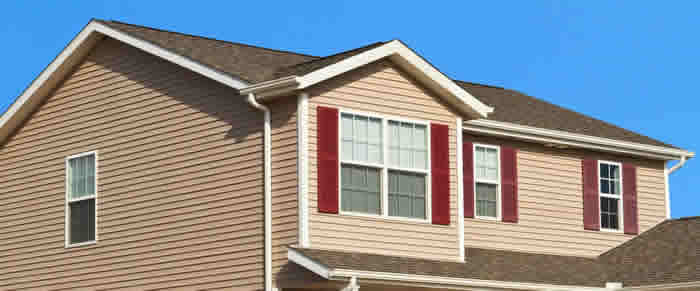
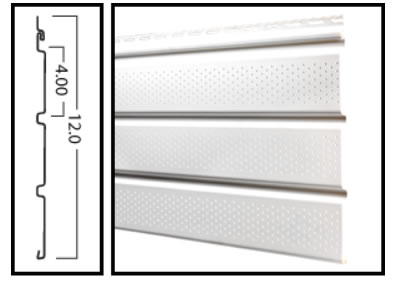
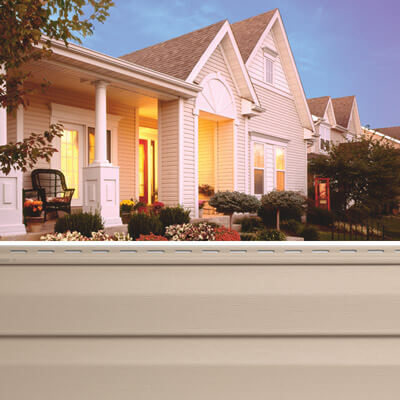
Vinyl Siding
Thanks to its low price point and relative ease of installation, vinyl siding is the most popular cladding material used in North America. Although some are not fond of its somewhat plastic-y look, many recent advancements have been made in its appearance, as well as in the selection and durability of available colors and finishes.
Cost:Vinyl is the least expensive exterior cladding option available—approximately 30% less than the insulated or foam-backed version.
Installation Difficulty: Installation is relatively fast and easy, meaning any labor costs will also be lower.
ROI: According to the National Association of Realtors (NAR), you can expect to recoup up to 83% of your investment in new vinyl siding at resale.
Energy Efficiency:Varies from product to product but, generally, non-insulated vinyl siding offers minimal insulating effects and has little impact on energy use.
Ideal User:Requiring minimal tools and materials to install and available through big box stores as well as online outlets, vinyl is the most feasible option for do-it-yourselfers, and a cost-effective solution for upgrading the curb appeal of a home destined soon to be sold or “flipped”.
Pro Tip: Compare the thickness of the panels—thicker material will generally be of better quality and more durable.
Benefits
Needs no painting, won’t warp or twist, and is considered to be the best choice for defending your property against insects and moisture
Available in a range of colors, styles, textures and trim options for effortless customization
As one of the only non-absorptive cladding options, minimizes the accumulation of moisture and the potential for penetration
Lightweight and can be fitted over existing siding
Color nowadays is infused right through the material, so fading and scratching are no longer major concerns.
Drawbacks
Over time, can melt, burn, crack and become unstable or rattle in high winds
Even with recent advancements, the oft-touted “realistic” appearance of wood finish vinyl is debatable.
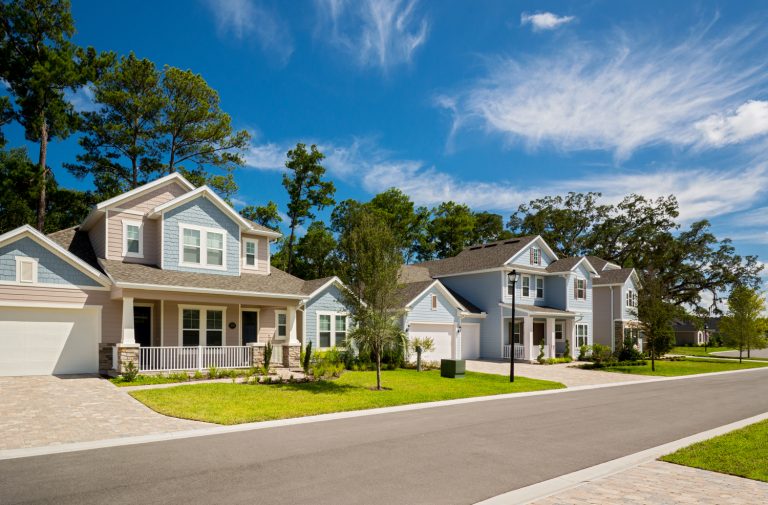
Insulated Vinyl Siding
Insulated siding is vinyl siding with rigid foam insulation laminated or permanently attached to each panel. It reduces energy loss through the studs of a structure by impeding thermal bridging, blanketing a home’s exterior to increasing the overall R-value of exterior walls.
Cost: Slightly higher than traditional vinyl and similar to concrete or wood siding
Installation Difficulty: Comparable to traditional vinyl. Some insulated vinyl options may come in larger panels or longer boards, meaning faster installation and fewer visible seams.
ROI:The general consensus seems to be that you can recoup in the range of 77% of your money invested in insulated siding at resale.
Energy Efficiency: Can increase R-values to 3 or higher, depending on product used and geographical location of the application.
Ideal User:Anyone looking for a cost-effective upgrade that will provide improved energy-efficiency and performance, and that has a good chance of retaining its appearance and value for the duration of their occupancy.
Pro Tip:Feasible to tackle as a DIY project, but ensure that the manufacturer provides detailed instructions, follow them to the letter, and also educate yourself as much as possible through online and other resources.
Benefits
Recognized as a form of continuous insulation by many energy codes and energy efficiency programs such as ENERGY STAR and LEED
Never needs painting, caulking, or anything much more than occasional cleaning with mild soap and a garden hose
Better impact resistance, weather performance, and sound control than traditional vinyl
May qualify homeowner for energy tax credits
Drawbacks
Can be prone to warping and/or buckling if not properly installed
May impede the ventilation and drainage of the property
Can become loose during high winds or storms
Fiber Cement Siding
A blend of cement, sand, and cellulose, fiber cement is widely considered to most closely mimic the appearance of real wood, shingles, stucco and other textures. Can be purchased factory-primed and painted after installation, or pre-painted at a higher cost for improved performance and durability.
Cost:Two to three times higher than aluminum or vinyl
Installation Difficulty: Those with some DIY skills should find installation relatively easy as long as the manufacturer’s instructions and specifications for their products are followed.
ROI: According to the National Association of Realtors (NAR), expect to recoup up to 79% of your investment in fiber cement siding at resale.
Energy Efficiency: A low R-value and minimal energy savings can be bolstered by the use of insulating sheathing products.
Ideal User:Property owners who are confident with DIY projects and who are not planning to sell for at least the next five years
Pro Tip:If installing yourself, cut nailing time in half by renting a pneumatic coil nailer designed specifically for fiber cement. (Make sure to experiment first on a non-visible area!)
Benefits
Non-combustible and resistant to fire, impacts, insets, rodents and water
More durable than wood
Can result in a noticeable improvement in energy costs and home comfort
Will look great for 10+ years if you choose to paint it yourself to perfectly match or complement your exterior
A clean, smooth appearance due to no overlapping seams
Drawbacks
Requires more manpower to deliver and install, which can drive up costs
Not completely maintenance-free as with time repainting is sure to be required
Depending on how long the property is owned, siding may eventually need to be repaired or replaced.
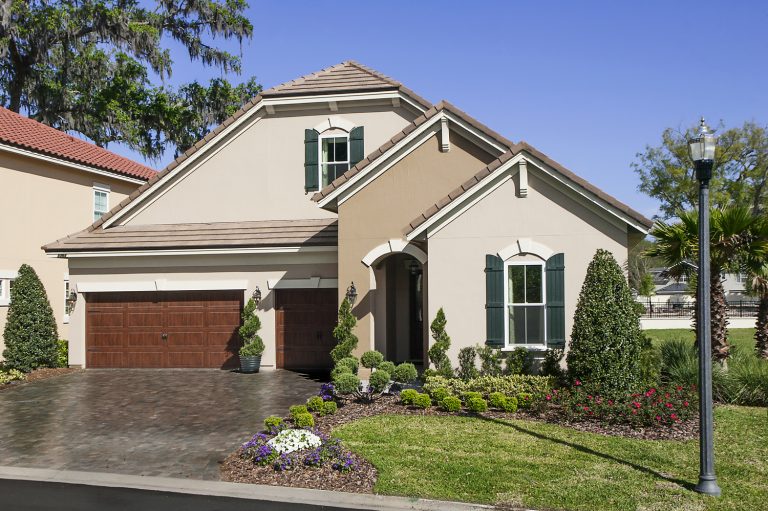
Wood Siding
Generally the most expensive siding material, wood is nonetheless preferred by many for its warmth and charming aesthetic. It is often the material of choice in areas where architectural heritage and continuity are in demand. The most commonly-used and durable woods for siding are western red cedar and redwood.
Cost: Wood is often the most expensive option, and even more so when you factor in future painting and maintenance costs.
Installation Difficulty: Perhaps best left to the experts. Caulking, finishing, and special materials for allowing the wood to breathe all add up to extra time and labor-intensity.
ROI: Despite the fact that it needs regular upkeep, real wood siding is perceived by buyers as a high-end, desirable feature and can boost your home’s resale value appreciably.
Energy Efficiency: Estimates vary, but by most accounts wood siding has a relatively low R-Value, ranging between 0.8 and 1.19 depending on the configuration and thickness of the material.
Ideal User: Anyone whose home is part of a neighborhood of similar homes with a specific architectural heritage or aesthetic, or those who just love the look of real wood and feel its authentic appearance is worth some extra cost and effort.
Pro Tip: Inspect your wood siding regularly to identify any problems and fill in holes to discourage pests.
Benefits
Impact-resistant
Long-lasting with proper care, and easy to repair
Customizable installation options and materials, including clapboard, shingles, and shakes
Generally considered to be the most biodegradable and environmentally-friendly option
Often the first choice for agricultural and commercial applications, steel siding offers unmatched protection and durability for a variety of structures and applications.
Cost: Often the cheapest to install, especially if applied over existing siding. Aluminum costs less than steel, and expect to tack on about $1 extra per square foot for insulated panels.
Installation Difficulty: Although a bit more challenging than vinyl to install with some special tools being needed, steel can nonetheless be applied quite quickly and efficiently.
ROI: The ROI for metal siding averaged nationally is estimated to be 86%.
Energy Efficiency: Even uninsulated metal siding provides some degree of protection against heat loss in winter and acts to maintain coolness in summer.
Ideal User: Anyone looking for a practical, environmentally friendly, and damage-resistant material that can perform well for up to 50 years with minimal maintenance would be wise to investigate metal siding.
Pro Tip: With large metal panels weighing several hundred pounds, you’ll need a partner or team to help move them into position for mounting. Pay special attention also to the manufacturer’s recommendations for proper flashing and waterproofing.
Benefits
Straightforward installation and unlimited colors to choose from
Impervious to insects and resistant to fire, climate extremes and high winds
Green product life cycle (meaning it is often manufactured from recycled metals and can in turn be recycled when dismantled)
Drawbacks
Can be noisy, susceptible to impacts, and easily dented
Unless aluminum is used, scratches must be painted or will rust
Rust can be a concern for non-aluminum metal siding in coastal areas with salt spray, fog and other forms of humidity and dampness
So, there you have it—an informative starting point for kicking off your siding search. You should also check out the many useful resources and how-to videos available online and elsewhere to help you make an informed decision, and find out what you can about local and national siding manufacturers and suppliers.
Any effort you put in should be well worth it. Whether you have a horse farm in Chico, operate a restaurant near the ocean in Jacksonville, or make your home amid the four-season splendor, siding installation is an affordable and relatively straightforward improvement that can protect your property and pump up its curb appeal, along with the price it will bring when you sell.
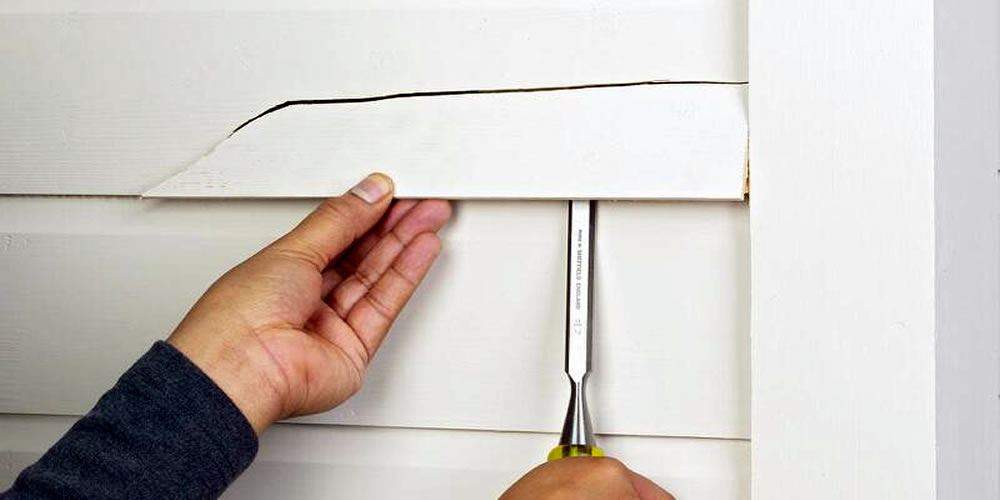
A hole in vinyl siding opens a door for moisture and insects to intrude. Fortunately, you can repair most small holes and punctures without a professional’s help. You’ll need a tube of color-matched vinyl siding caulk, which you can purchase from siding retailers. Caulk is matched the same way as paint. If the retailer doesn’t have information for your siding on file, take in a small piece of siding to ensure a good match. If the hole is larger than a nail or screw puncture, you’ll also need a scrap of matching siding to use as a patch.
Fill a Puncture
Clean the siding around the hole with vinyl siding cleaner or mild dish detergent and water and a soft sponge. Wipe the siding dry with a rag.
Cut the nozzle tip on a tube of color-matched vinyl siding caulk with a utility knife and fit the caulk into a caulk gun. Cutting the tip at a slight angle gives you more control over application. Prime the caulk tube by squeezing the trigger two or three times, then release the trigger.
Align the caulk tube’s nozzle opening over the hole in the siding.
Squeeze the caulk gun’s trigger to fill the space behind the hole with caulk. This step is important for a long-lasting repair. Squeeze as much caulk through the hole as you can, then slowly lift the nozzle and release the trigger. Overfill the hole slightly, ending with excess caulk outside the hole.
Scrape a plastic card or semi-rigid rubber caulk trimmer lightly across the hole to remove most of the excess caulk. Alternatively, let the caulk harden and then trim off the excess with a utility knife blade.
Patch a Hole or Tear
Clean the siding around the hole with vinyl siding cleaner or dish detergent and water, then dry the siding.
Cut a scrap piece of siding to a length that is several inches longer than the hole. A clean way to cut vinyl siding is to score it with a utility knife and then bend the vinyl at the score. It should snap apart. You can also use utility shears.
Cut off the uppermost edge of the scrap, which has a series of holes for siding nails, with a utility knife. Don’t cut off the whole curved or lipped edge across the top edge of the siding; only cut off the nail hole strip.
Trim off the bottom edge the same way that you trimmed the top, leaving the curved lip. After trimming, you should have a flat section of siding with a curved top and bottom edge.
Press the patch over the damaged section of siding. The curve at the top and bottom of the patch should fit over the same curves on the damaged section of siding. If the patch won’t fit over the damaged section, trim off the curved edges to make a flat patch.
Open a tube of color-matched vinyl siding caulk and fit it into a caulk gun. Squeeze the gun’s trigger a few times to start the flow.
Remove the patch from the wall, and apply a generous amount of color-matched vinyl siding repair caulk on the back of the patch. Don’t worry about using too much, as you can clean up excess caulk after the patch is installed.
Apply a contiguous bead or line of caulk around the hole in the siding.
Set the patch over the damaged siding. Apply pressure to help the pieces stick together, if necessary. Let the sealant dry for as long as the manufacturer recommends, then apply more caulk around the perimeter of the patch, if desired. If you trimmed off the curves and mounted a flat patch, apply painter’s tape across the patch to hold it against the siding until the caulk dries.
Things You Will Need
Vinyl siding cleaner or dish detergent
Sponge
Rag
Color-matched siding caulk or sealant
Utility knife
Caulk gun
Plastic card or caulk trimmer
Scrap siding
Painter’s tape (optional)
Tip If possible, repair vinyl siding in warm weather when the vinyl is pliable. Vinyl becomes hard and brittle in cold weather.
Warning Severe damage usually requires total replacement of the bad section, which a vinyl siding installer can complete reasonably quickly. Although vinyl siding interlocks in strips, installers have a special tool that unlocks the seams for easier replacement.
Scraping too much caulk away from a puncture repair can allow the hole to reopen once the caulk dries. Leave some excess on the outside.
Most online calculators for home remodeling–counters, tiling, roofing, siding–do little more than perform simple area calculations. They are less than helpful because they are marketing come-ons to get you to buy a certain product.
However, there are a few that stand out.
1. Best Siding Calculator: Mitten
The best thing about Mitten’s siding calculator is that it breaks apart and adds up all of the various surfaces for you.
Most siding calculators ask for total square footage right off the bat. But this calculator does it for you, and includes waste materials and those weird surfaces like gables, soffits, and fascia.
Be warned, though: there is nothing all that sophisticated about this siding calculator. It does not do the work for you because, frankly, calculating out siding is laborious business. Instead, it forces you (in a good way) to think methodically and in separate categories of surface area.
Downside: no price estimates. Also, it’s an overall clunky device: often confusing as to which “Calculate” button to press, since the form has several.
It is an acceptable tool and with a little revamping, they could make it even better.
This tiling calculator allows for a more visual, graphic representation of your tiling layout than you might find with other calculators.
So, instead of plugging numbers into forms, you get to do the more natural thing, which is moving walls by dragging them with your cursor.
As with all calculators, this one exists to plug a product. In this case, the product is Warmly Yours, radiant heating that installs below the tile. The product plug isn’t too intrusive, and it doesn’t come until the very end.
One downside is that the company has not made any improvements to this tool since it was released.
3. Best Roofing Calculator: New England Metal Roof
You’re hard-pressed to find a good online roofing calculator that gives price estimates. Most calculators stop at square footage, afraid to venture into the scary world of price estimates.
But New England Metal Roof’s calculator mightily tries to peg a rough dollar estimate for your roofing job, including tear-out of old roof. Note: this does not just include metal roofs; it also includes composite, wood/cedar, Spanish tile, and many other times of materials, including metal.
One downside is that this online calculator does not let you input a precise roof pitch. Roof pitch does have a very real determining factor on price. However, most homeowners will not get up on the roof or in the attic to measure pitch, and will just estimate anyway. So this calculator’s Flat, Low, Medium, Steep, etc. pitch designations work just fine.
The company seems to be on top of this calculator and they do tend to keep it updated.
At one time, the best counter calculator was from DuPont. With their Corian/Zodiaq (quartz) countertop estimator, not only did they take on the mundane task of calculating square footage, but they factored in things like edge treatment and backsplashes. And they worked in price estimates for installation, too.
All of this past-tense is because DuPont may have pulled this plug on this calculator. There merely say that the calculator is “currently undergoing some technical updates.” The only problem is that it has been down for technical reasons for a very long time.
In the meantime, the ReferWork calculator does the job adequately enough.
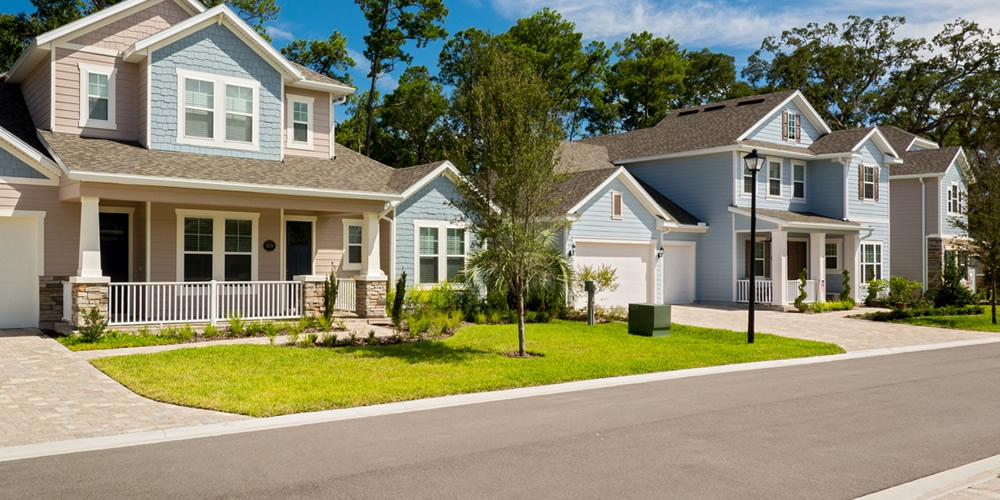
Selling a house can be exciting as it can be stressful. And learning to look at your home objectively is easier said than done, but it can be extremely valuable to look at your home from a buyer’s perspective – yielding a faster sale and potentially a higher price. Who doesn’t want to get top asking price for their house? We all know to detail our cars before selling them, so why is it so hard to apply the same principle when we sell a house?
For starters, a home is very personalized. It’s also bigger and there’s a lot more surface area to “detail” both inside and out. To help you detail your house before you sell it, we’ll discuss tips for detailing the exterior of your home, more specifically, what colors to use.
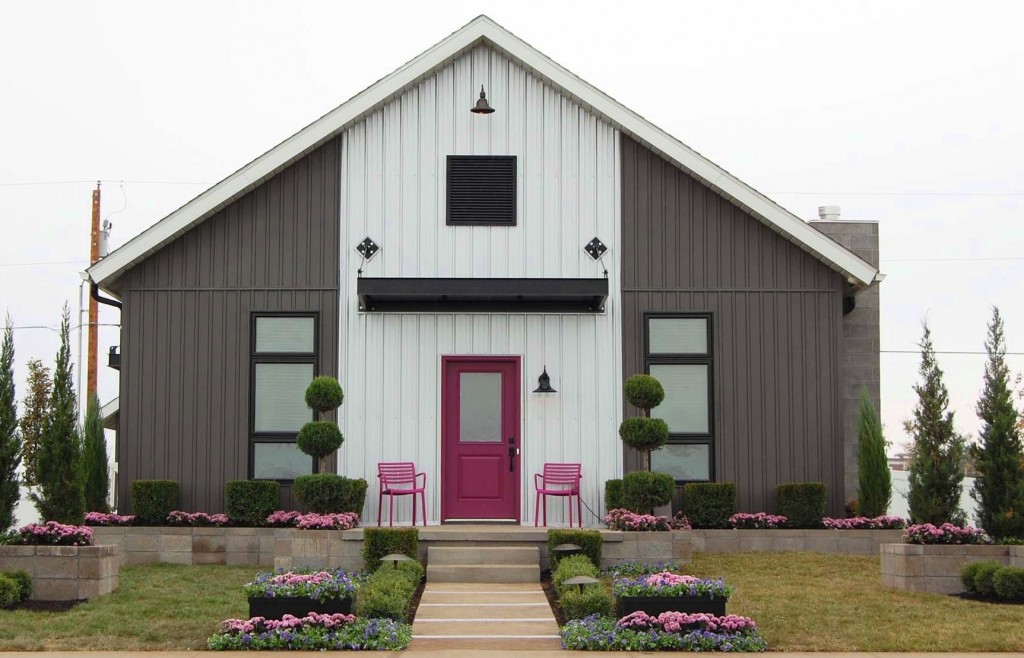
Six ways color can help you sell a house.
1. Washing your house can give it a fresh look.
Step back and look at the exterior of your home. A quick pressure wash is a good place to start. Now that it’s clean, does it look fresh, warm and inviting? Or has it faded over time? Is it bland and/or the same color as the rest of the neighborhood? Buyers are going to be touring various homes, so you’ll want yours to make an impact.
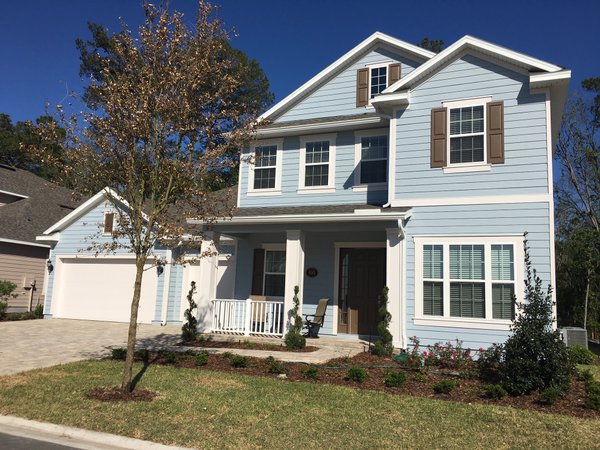
2. Painting your home? Stick with classic colors.
Now, here’s where you need to proceed with caution – after all, painting your home “Barney” purple will leave quite an impression – of terror. I recommend sticking with classic colors. If all the homes in your neighborhood are beige, a variation of white can give your home a fresh look depending on the style. Or perhaps you may consider a soft yellow to bring some life to the exterior without going overboard.
Take a hard look at the aspects of your home you don’t intend to change. What color are the roof and the windows? Would a new color scheme still work with these?
3. Add a second body color for greater impact.
Of course, repainting your home could be an expensive undertaking. One recent trend in exteriors is to have a second body color. Applying this technique to an older home can have tremendous impact and cost less. I love the idea of adding a second paint tone to highlight the entrance of a home or a key architectural feature.
4. Freshen your trim color.
An even less expensive option would be to change the trim color around your doors and windows. If there isn’t enough contrast between the trim color and the main body color, this would be a great alternative to repainting the entire house. Pay attention to the color of your windows. If you have white or almond windows, you don’t want to trim them with a dark color.
5. Change up your shutter color.
Perhaps changing the accent color of your home would create enough impact. Better yet, you may decide to replace your shutters with new, maintenance-free, pre-colored shutters. Buying pre-colored shutters would help you stay in within a classic color family and they won’t fade or fall apart before you sell your home.
6. Add a fresh coat of paint to your front door.
If you do nothing else, at least consider painting your front door. This is the first thing home buyers will notice, and it is where you can get away with being a little more daring. Picture your buyers standing on the front porch of the house you’re selling, admiring the fresh new color, while their realtor fumbles with the lock box. What a great place to create a first impression!
Final thoughts on selling a home.
There are those that believe it is best to play it safe when it comes to color. While it is true that you don’t want to scare away buyers with a purple house, color can be a powerful tool for a seller and memorable aspect for home buyers!
How do I clean vinyl siding, especially areas that have mildew or mold? -Elvin
Even though vinyl siding is a low maintenance material, it still needs cleaning from time to time to remove dirt and grime. In humid climates vinyl siding may also develop mold or mildew, which should be removed as well.
Cleaning instructions are usually available from the vinyl siding manufacturer, and are often found on the siding warranty. If instructions are not available, or you’re not sure what brand of siding you have, follow the procedure below to clean your vinyl siding.
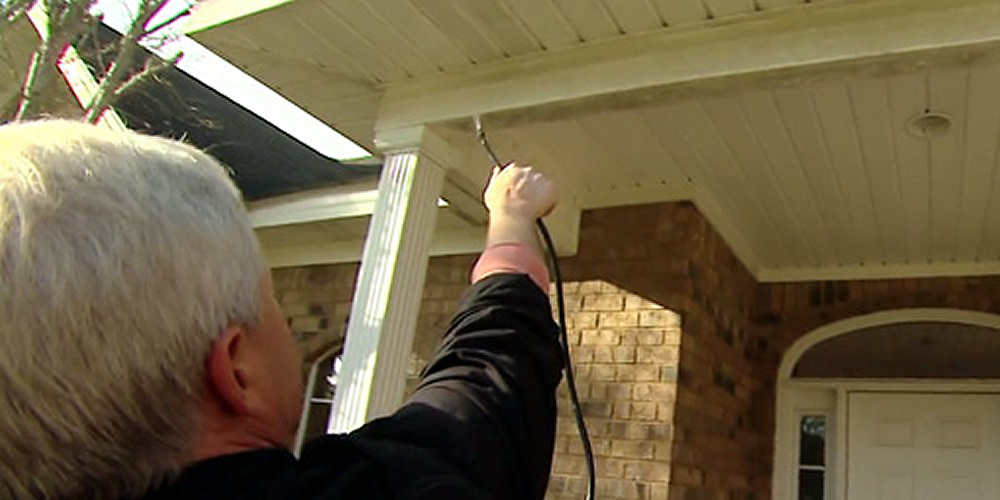
Removing Dirt from Vinyl Siding Hosing down vinyl siding with a garden hose equipped with a spray nozzle or a pressure washer set on a medium spray pattern is often enough to remove dirt and grime. When hosing down or pressure washing vinyl siding:
Make sure the pressure washer spray pattern is wide enough to prevent damage to the siding, and keep the nozzle moving.
Start washing at the bottom and work your way up; then rinse from the top, working your way down.
To prevent water from running behind the siding, spray even with or down on the siding, and spray in the direction of the overlapped joints.
Cleaning Solution for Vinyl Siding If the vinyl siding needs additional cleaning, add special cleaning solution to a pressure washer, or mix up the following in a bucket to use to clean by hand:
1 gallon water
1/3 cup powered laundry detergent
2/3 cup TSP (trisodium phosphate) cleaner
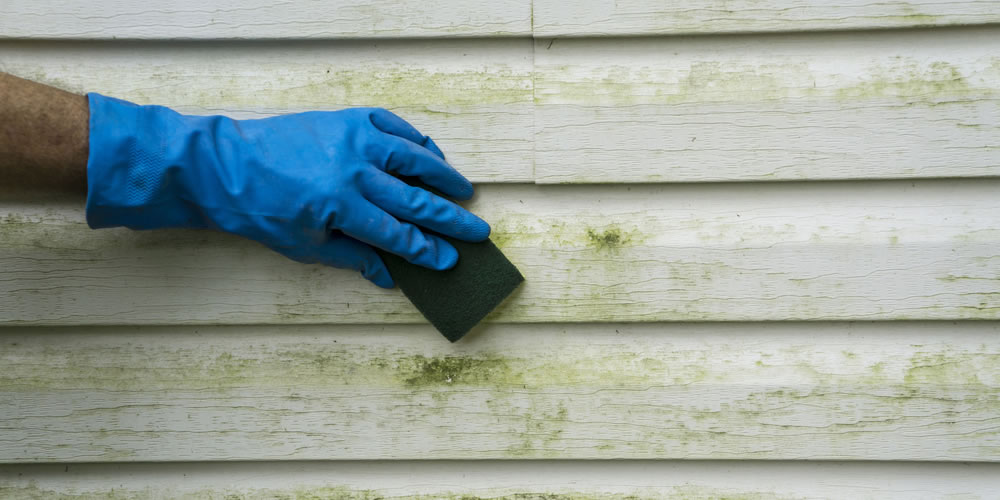
Dip a long handled, soft bristle, car cleaning brush in the solution; and scrub the vinyl siding gently starting at the bottom and working your way up. Follow by rinsing off the cleaning solution with a garden hose, starting at the top and working your way down.
Removing Mold and Mildew from Vinyl Siding To kill mold and mildew on vinyl siding, apply a mold and mildew remover, such as Wet & Forget Outdoor.
You can also use bleach to treat mold and mildew on vinyl siding by adding one quart of household bleach to each gallon of the cleaning solution above, then:
Wet down any plants near the house, and/or cover them with plastic sheeting to prevent damage from bleach. Covering plants with plastic on a sunny day may cause damage from overheating, so remove the plastic as soon as possible.
Use a pump up sprayer to wet the siding down with the diluted bleach/cleaning solution, working from bottom to top.
Allow the bleach solution to remain on the siding for 10 minutes or so.
Scrub the siding from bottom to top with a long handled, soft bristle brush.
Rinse the bleach solution off the siding from top to bottom with a garden hose.
CAUTION: Wear rubber gloves, long sleeve shirt, long pants, and goggles when working with strong chemical cleaners such as TSP and bleach. Follow the instructions on cleaning products carefully. Do not mix bleach with cleaners that contain ammonia, vinegar, or any cleaner that says it should not be mixed with bleach, since it can cause a chemical reaction and release poisonous chlorine gas.
As rainwater and condensation accumulate on vinyl siding, it can develop black spots of mold and mildew. Standard household cleaners won’t necessarily remove mildew from siding, but a solution of bleach or vinegar should do the job. If you use bleach, protect the plants nearby from runoff by covering them with plastic drop cloths. A power washer is the most efficient tool for the job, but not all siding can handle the water pressure, so check with the manufacturer or test a small, inconspicuous area to determine whether you can use a power washer without damage.
Turn off the electricity to any outlets and lamps on the walls you plan to clean. Cover them with plastic sheeting, and secure the sheeting to the wall with duct tape.
Mix a solution of 3 parts distilled white vinegar to 7 parts water in a bucket. Alternatively, mix a solution of 1 part household bleach to 4 parts water.
Dip a long-handled, soft-bristle brush into the solution. Gently scrub any visible mildew spots.
Pour the solution into a power washer. If you can’t use a power washer on the vinyl without damaging it, use a lower-pressure pump sprayer instead. Spray a 5-foot-wide section of the house with the solution, moving from the ground up to the roof. Avoid angling the spray of the solution upward so it travels under the layers of siding; instead, aim it so it hits the siding from above. Spray from a ladder as you move higher up the wall. Get the siding wet enough for it not to dry while you work.
Tip the remaining solution out of the sprayer and back into the bucket. Rinse the sprayer quickly and refill it with clean water. Spray the wet strip of vinyl with the water from the top of the house downward to rinse off the solution.
Repeat the process with the next 5 feet of siding. Continue in this fashion until you have cleaned the entire affected area.
Things You Will Need
Plastic sheeting
Duct tape
Bleach or distilled white vinegar
Bucket
Long-handled, soft-bristle brush
Power washer or pump sprayer
Ladder
If the siding is dirty as well as mildewy, add 1/3 cup of a mild household cleaner for each gallon of the cleaning solution. If you use bleach rather than vinegar, make sure the household cleaner does not contain ammonia, as ammonia and bleach combine to release a toxic gas.
To save time and effort, consider renting a second power washer or pump sprayer, so you can keep one full of the cleaning solution and the other full of rinse water. If the siding is only mildewy in isolated areas, you might not need to wash the entire surface. Scrub the mildew with the soft-bristle brush and rinse it using a garden hose with a spray nozzle.