When should you DIY and when should you leave it a professional?
If the TV programming landscape is any indication, the DIY spirit in our country is alive and well. And it should be. As a country, we tend to be independent and self-sufficient. When it comes to home improvements, however, do-it-yourself may not always be the answer, so it’s important to know when to call in a professional.
The most common projects that I see DIYers attempting are:
Painting, both interior and exterior
Replacing a front or other entry door
Replacing interior trim
Installing fencing
Installing new flooring
Laying down new patio and paver walkways
Landscaping
Changing lighting fixtures
Updating garage and other storage areas
Installing new siding
Some of these are simple fixes for even a novice DIY-er, but others can leave you with a big mess, both aesthetically and financially, if something goes awry.
If you’re not sure whether to attempt a project or call an expert, ask yourself these questions:
1. Have I done a project like this before?
If you answered yes (and have good memories of the previous attempts!), pursuing this project should be easy. Being comfortable off the bat is obviously helpful—if challenges arise, you will be better equipped to solve them.
2. Do I feel comfortable taking on a new challenge or new type of project?
If it’s a new type of project (or you had a poor experience on a prior attempt), do your research. Plenty of online discussions and YouTube videos will give you the basics on how to proceed, or at least will help you realize you’re not ready. If you need hands-on instruction, bigger home centers and stores will offer workshops for different types of projects that can help get you moving.
3. Do I have a resource to turn to if I have questions?
Having someone to fall back on if you get in over your head is key. Make friends with your local contractor! You never know when you might need some fast help. If I know a friend is in the middle of a DIY project and he comes up on caller ID, I usually answer “Dino’s construction hotline.” I know why they’re calling and I know I can help.
4. Is this going to involve any structural framing? If so, do I have a plan to address potential issues?
No one has x-ray vision. There are all kinds of hidden surprises in the walls, floors and ceilings. If you have a questions, ask first and cut later. Especially if it is anything related to engineered lumber and trusses. Once they are cut, they can lose all weight carrying capacity. Better to go slow and have a pro or engineer look at it first.
5. Will this involve electrical, plumbing or HVAC work?
Back to surprises in the wall. There are many pipes and wires lurking behind walls and flooring so go slow and proceed with caution. If you strike something, don’t just tape it, glue it or wrap it in duct tape. Have a pro look at it and fix it correctly. I can tell you multiple horror stories of electrical and plumbing that I have seen buried in the wall. I know my limits; we do not touch electrical plumbing or HVAC. We hire the pros.
6. Do you have a habit of starting and not completing projects?
I have looked at many projects that were started by the homeowner and never completed. Sometimes life happens. Sometimes we get in over our head. Sometimes we are just better at ripping things apart, then putting them back together. I get it, but it’s still not ideal. Whatever the case, if you have a habit of starting and not finishing, maybe you should hire a pro.
7. How long will the project take? Can I live in the area while work progresses?
I wrote an earlier blog post about living through a remodel project. Having the added pressure of doing the work yourself, while also likely working a separate, full-time job, and living through it can be a real challenge. Weigh the options to see if your time, and quality of life, is worth the money to hire a pro.
8. Do I have all of my supplies?
Most DIYers are evening and weekend warriors. That can lead to needing a critical supply after the home centers and supply houses have closed. Be prepared with all of your supplies ahead of time.
Overall, it really comes down to budget and time. If you‘re on a tight budget and feel comfortable with the project or enjoy the work, then by all means dive right in. Remember, you are still responsible for obtaining all building permits and meeting all building codes. Don’t skip it! The inspector will be able to look at what you plan to do from a safety standpoint and make sure that it is safe to attempt.
Keep in mind: projects rarely go off without some challenges, and never as easily as they show on TV. Have a backup plan and someone you can turn to for advice.
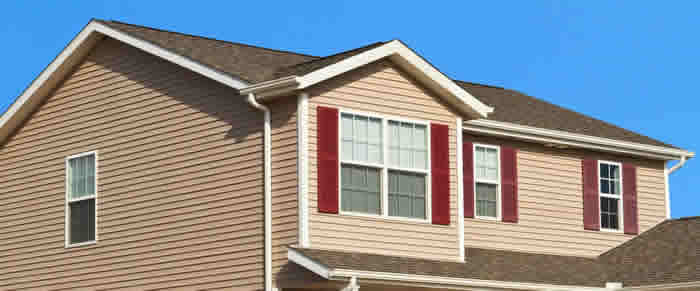
Vinyl siding is just about the most popular exterior building material in use today. It is used in vast quantities in the remodeling market as people replace old aluminum siding or cover wood siding maintenance nightmares. Over two billion square feet of vinyl siding is produced each year in the USA.
This number is expected to rise significantly because of the arrival of the new solid core siding product. People who were previously turned off by the look of vinyl may be attracted to this product. Rising energy costs will undoubtedly cause more builders to use this siding to make their homes more energy efficient.
Vinyl siding is not too hard to install but it takes a little skill, proper equipment to get you and the product up in the air, and some layout skills. You need to be able to look forward and above you to see how you are going to deal with certain details on the home. You must always be aware of drainage paths and protection of the framing lumber. Water can get behind vinyl siding and it must not be allowed to touch any wood!
Guess what? The number one problem with vinyl siding is improper installation! Over 99 percent of all problems can be traced to installers. Unfortunately, many installers use unskilled laborers to install the product. Or, some builders allow untrained individuals to attach it to walls and gable ends. While it is not a hard product to install, there are many things you need to know if you want a professional installation. Here are several of the most important aspects of installing vinyl siding:
Required Tools
Vinyl siding requires some very basic tools. If you are a DIY’r attempting this project you probably have many. Here is a list of tools that will help you complete the job: Hammer, level, tape measure, chalk line, circular saw with a fine blade (saw blade will be installed backwards on the saw!), utility knife, tin snips, framing square, caulk & gun, drill (optional), cutting/sawing table, ladders and misc. other staging equipment. You will need some specialty tools as well such as a snaplock punch and a nail slot punch. A zip unlock tool may also come in handy.
Surface Preparation is Critical
The surface to which the siding will be applied must be as smooth as possible and solid. Now is the time to seal energy leaks. Caulk all cracks around windows and doors at this time.
If you want to increase the energy efficiency, you may want to install foil faced foam sheathing at this time. This is especially true if you are installing vinyl over an existing brick or wood sided house. If you are installing vinyl on a new home, be sure you have instructed your builder to install foil faced foam sheathing AND an air/water infiltration barrier.
Trim – The Detail Work is First – No Instant Gratification!
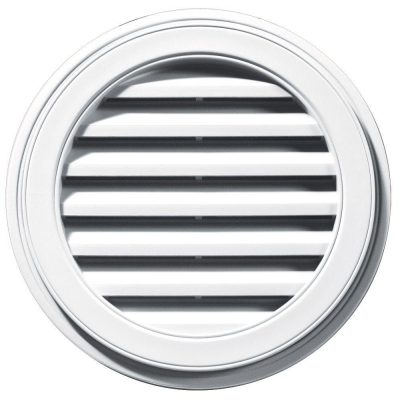
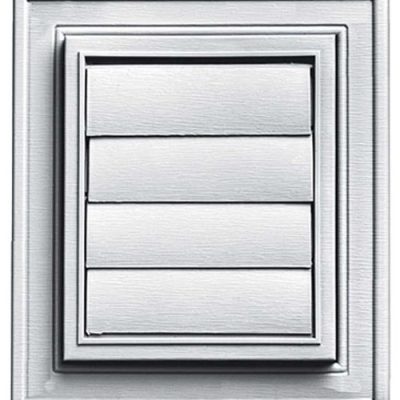
Corner posts, J channels, light blocks, dryer vent accessories, front door cornices, arches, etc. are all installed first. The vinyl siding is actually the last thing that is installed. The corner posts, J channels, and other trim pieces have a channel into which the ends of the siding rests. This hides the cut end of siding from view. Why? Vinyl siding is not solid. If you were to look at it sideways, it would be quite unattractive.
If you are working in warm weather, the vinyl siding and trim is very pliable. It will cut readily with a tin snips.
J channel is the trim piece that is used to surround windows and doors on many occasions. It is available in a standard width and often an extra wide width. The extra wide material looks more like real wood trim. I suggest you consider it. There are special ways that the trim must be cut and nailed. Each manufacturer publishes a handy installation guidebook with easy to understand language and illustrations. You must follow the instructions so that rain water does not get behind the siding and trim!
Starter Strip – An Aluminum Accessory
Vinyl siding pieces interlock with one another. You install vinyl siding from the bottom of the structure and finish at the top. The material is blind nailed through slots found at the top of the siding. So how does the first piece of siding keep from flapping in the breeze? You install a pre-bent piece of aluminum starter strip. It must be installed level or parallel with the line you wish to follow as the siding goes up. Remember, the first piece of siding is pulled up tight to the starter strip. Each successive piece of siding is pulled tight to the one below. So, if you goof up the starter strip, all the rest of the siding will be crooked!
Corner Posts
Vinyl siding and trim expands and contracts with changes in temperature. You need to plan for this. The corner posts must be installed 1/4 inch away from the soffit or other horizontal stop point at the top of each corner. Plumb each corner post and drive the first nail in the top of the nailing slots. All nails must be nailed in the top of the slots so that the corner posts ‘hang’ from the nails. Keep the nail head 1/32 inch away from the vinyl. This will allow the vinyl room to expand and contract.
If you need to splice two lengths of corner post together, the upper piece overlaps the lower piece. This allows rain water to shed off just like a shingle roof.
Installing the Siding!
Look at a full panel of siding before you install it. Note the upper and lower corners on the front and back. There are factory made notches. These notches are important. You may find yourself replicating them on a cut piece. These notches allow you to overlap pieces of siding. The siding pieces can move sideways independent of one another because of the notching.
Wind can cause vinyl siding to rattle. The sun and heat can cause vinyl siding to grow or expand. For these reasons, it is VITALLY important that vinyl siding be nailed properly! If you nail too loosely, the vinyl siding will rattle and flap as the wind blows. If you nail it too tightly, then it will bubble and bow on a hot day. The proper nailing is somewhat easy. The vinyl siding flange must be tight against the sheathing. The head of the nail must stop within 1/32 inch before touching the vinyl siding. This space is just less than the thickness of a dime! Make sure you and/or your installer does this part correctly!
Gable End Angles
How do you find these angles? Easy! Slide a full piece of siding so the top corner just touches the angle. Lay a scrap piece of siding against the gable end angle. Trace along the bottom of the siding a line which is parallel to the roof line. This is the line you need to cut to produce the gable end angle. If, after cutting, the piece fits (it should!), then save the outfall and use it as a template for all future cuts.
Installation Booklet
Get the booklet from the manufacturer! It will be a great aid to you.
Even if you aren’t sure you want to put vinyl siding on your home, you’ve probably at least considered it. Why? For most homeowners, it means eliminating the hassle and expense of repainting their house every five years or so – or paying someone else to do it. Besides saving work, vinyl siding can save you money. According to Rod Matthews, business manager/siding for Toledo, Ohio-based Owens Corning, vinyl siding costs about 11 percent less than cedar siding, and 26 percent less than aluminum. Expect to pay $160 to $250 per square (100 sq. ft.) for a quality vinyl product installed over rigid insulation. For these reasons, vinyl has become the most popular choice in siding. More than one-third of the exterior cladding installed on new and existing homes is vinyl. The balance is wood, aluminum, steel, brick or stucco. If new siding is in your future, keep these three key considerations in mind when looking at the vinyl option: 1. Vinyl siding isn’t for everyone; you have to like the way it looks on your house. 2. Not all vinyl is created equal; you’ll need to learn how to pick a quality product. 3. You’ll need a competent contractor. Proper installation is at least as important as product quality.
Is Vinyl Siding for You?
Purists sneer at the idea of wrapping houses – particularly older homes that have significant architectural detail – in “plastic.” Other common objections are that vinyl siding can’t hold its color without fading or yellowing, that it buckles in the heat and that it can mask serious problems with moisture in the walls. These were worthy concerns in the past, but vast improvements have been made in vinyl siding since it first appeared. Take a look at some of the new vinyl siding products. Typically they have a low-gloss finish that more closely resembles painted wood. Most manufacturers also offer realistic-looking grain patterns and have improved the look of trim pieces. Fading and yellowing aren’t major concerns with better vinyl siding products, nor is their rigidity if they are correctly installed. If you still aren’t sure you like vinyl, see how it looks on other houses in your area. You’ll know if it’s vinyl by looking at the corners. With vinyl, cap strips on the inside and outside corners cover the edges of the panels; clapboard and shingles usually have mitered edges at the corners or a trim piece installed flush with the siding. Then ask a local realtor how vinyl affects home values in your area. It will probably have a positive effect on most houses. But, John Leeke, a home-restoration consultant in Portland, Maine, warns against installing vinyl on homes in historic neighborhoods. “If there are 10 restored Victorians on a street and one has vinyl siding, the value of the one sided in vinyl will suffer,” he says. That doesn’t mean older houses can’t be sided with vinyl. Manufacturers now offer period patterns, including details like fish-scale shingles that are found on older homes. Again, look at other houses in your area. If others have vinyl siding, it’s far less likely to diminish the value of your home. Another caveat is vinyl’s dubious ability to mask trouble beneath. Painted wood often peels or chips when there’s a problem, but vinyl offers no such clues. Be sure leaks, moisture condensation problems and any structural defects have been addressed before the siding goes on.
Judging Quality Siding
Technically polyvinyl chloride (PVC), the vinyl that’s used in siding includes a number of additives that help it resist fading, protect it against ultraviolet rays and provide dozens of color choices. (The color goes all the way through the material, so it can’t flake off.)
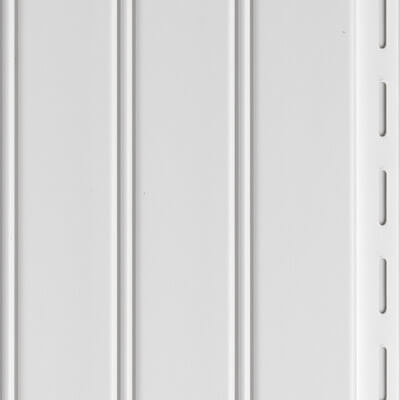
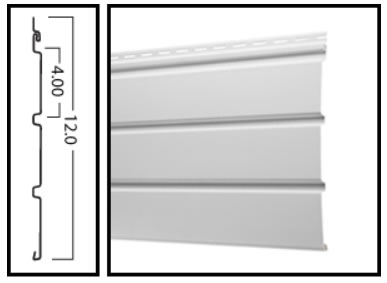
What you see. Vinyl siding comes in textured or smooth panels. Those with a simulated wood grain are meant to imitate rough-sawn wood that’s been stained. Panels are available in horizontal and vertical configurations. Horizontal siding tends to look best on traditional houses, while vertical panels fit well with many contemporary designs. There are also a number of widths. You’ll find 8-in.-wide panels or panels that look like two 5-in. or three 3-in. courses of siding. Panels are complemented by vinyl soffit, window trim and other accessories.
Below the surface. Vinyl siding standards are covered by the American Society of Testing and Materials (ASTM) Standard 3679. Any vinyl siding you buy should have this designation on product fact sheets and packaging. This is a minimum standard, however. To pick a product that exceeds the minimum standard, follow these guidelines:
Panels should be at least .040 in. thick; .042 to .045 is better. The ASTM standard requires only .035 in.
Soffit panels should be about .05 in. thick. Because soffits are suspended horizontally and secured at the edges only, the extra thickness prevents panels from sagging.
Look for antiweathering protection – sunlight is deadly to raw vinyl. While the actual ingredients designed to keep vinyl from fading and degrading are proprietary, a common one is titanium oxide. You can also get an idea of a product’s durability by asking the dealer or contractor to explain why and how it will resist weathering.
The warranty is another clue to how weather resistant a product is. Few building products come with the long warranties offered by vinyl manufacturers. Fifty years is standard. Some products even come with a lifetime warranty that can be transferred to the next owner of your home. However, some warranties are prorated: The longer the siding lasts, the less the company will pay. Make sure you read the fine print. Some manufacturers only promise to recoat rather than merely replace damaged siding. And most warranties just pay for the product – not the labor for installation.
NAILS THROUGH A SLOT at the top of each vinyl siding panel help hold the siding in place. A space of about 1/32 in. should be left between the nail head and panel to provide space for movement during temperature changes.
Getting a Quality Job
If you were to throw the names of the top 10 vinyl siding companies in a hat and pick one, you would probably end up with quality siding. Do the same with 10 local contractors, and the installation quality would be far less certain. A contractor’s expertise and experience are crucial to a good siding job. The reason is the material itself. Because vinyl expands and contracts so much, even the most expensive siding will buckle and warp if not put on correctly. Experienced contractors take a number of steps to keep this from happening. For example, panels are installed with a 1/4-in. clearance at all openings and stops, such as where a panel butts up against a window or comes to a corner of the house. That clearance is increased to 3/8 in. when siding is installed in temperatures below 32°F. You’ll also see a row of slots at the top of each panel. Your siding contractor should drive his nails through the center of the slots, leaving a small space, about 1/32 in., between the nail head and siding. That allows each panel to move slightly with temperature changes. Because installation is so important, check references of any contractor you’re considering. Request written estimates, then visit past jobs and a current project to give them a thorough once-over. Look for these details:
Rigid insulation. It provides a smooth surface for the siding, adds some insulating value and cuts air infiltration. Joints between rigid insulation panels should be taped for maximum energy savings. It’s a small task, but signals quality.
Corrosion-resistant nails. Look for aluminum or hot-dipped galvanized nails.
Straight courses. Examine both sides of windows and doors. Panels should continue from one side to the next in perfect alignment. If they’re uneven, the job will look sloppy. The same holds true at corners.
Detailing around openings. The J-channel that receives the panel ends should be neat and precise. Look for mitered corners and smooth caulking application.
A clean job site. Contractors should clean up at the end of each day. Materials and tools should be covered and protected. Debris should be picked up for disposal.
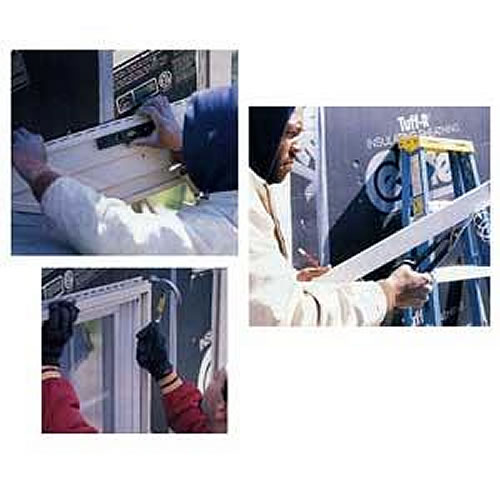
SIDING COURSES (above, left) are checked for level several times during the installation process. The detail shown here is tricky because the wall being sided adjoins the sloping roof of a garage.
PART OF MANY VINYL siding jobs involves capping window frames (middle). Here, a contractor trims a length of coated tin before applying it to a window. Mitered corners are a sign of quality work.
J-CHANNEL IS NAILED IN place around the perimeter of a window (right). The channel holds the edges of siding panels that abut the window, providing a clean, crisp finish to the end of a panel run.
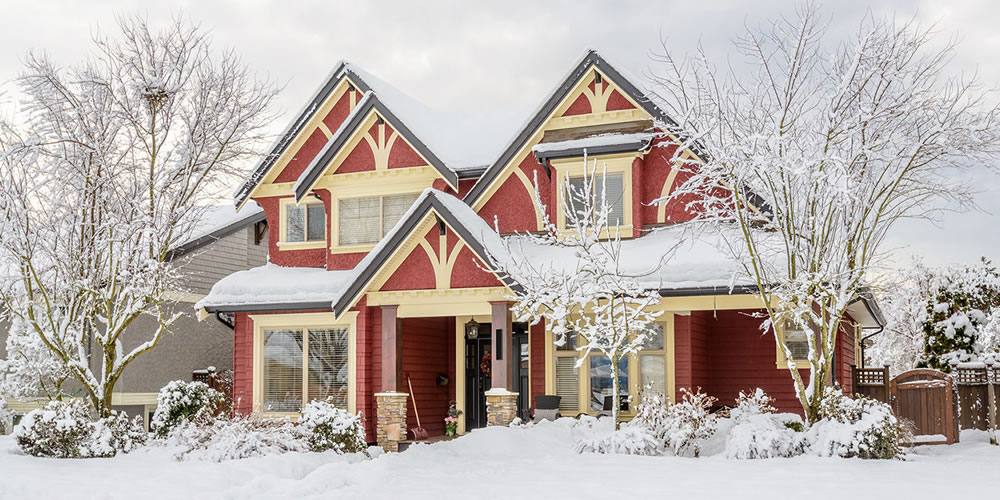
Whether you are a new homeowner, or have been living at your residence for several years, it is never too late to start a winter maintenance routine for your vinyl siding. After all, your home’s exterior is 100 percent exposed to the intemperate weather conditions that are known to occur this time of year. These conditions often lead to a long list of home siding damages that can affect your quality of comfort, as well as your bank account.
If you want to avoid costly repairs and replacements, protect your investment, and keep your home looking beautiful, it is necessary to take good care of your siding. In order to alleviate some of the natural wear and tear experienced by siding during the winter, you can implement some easy upkeep and protect your vinyl from inclement winter weather all season long. Continue reading to learn how you can get started.
Keep it clean.
Regular cleaning is an important part of winter maintenance. This does not mean you have bundle up in all your winter gear and bear the cold to clean it every week; instead, wash it once a month with a power washer. When using a power washer, be sure to always put it on a low setting to avoid any damage, and if the siding is already damaged, do not use a power washer at all. As for a cleaning medium, use a mix of Trisodium phosphate and soapy water. Simply apply, and then rinse from the top down.
Check for damage.
It is important to always keep an eye out for exterior damage to your home. However, on a routine basis, you need to closely inspect your siding for damages and defects. Catching a small problem early on can save you a lot of time and money. Weekly inspections are a good start, followed by a comprehensive inspection conducted by a professional roof and siding company. When inspecting your siding, look for cracks, gaps, and water damages; but also remember to check weep holes (holes punched in the bottom of siding for drainage purposes) for clogging issues and pest infestations.
Hire a professional.
You are not expected to be a siding expert, so it can be a challenge locating all the possible vulnerabilities and defects on your home. For this reason and more, it is very wise to hire professional siding maintenance on an annual basis to ensure your investment is well-protected. There are thousands of people and businesses that claim to provide this kind of service, but do not be fooled by fly-by-the-night or unqualified companies. Be sure to choose a company that has extensive experience and a good local reputation for quality service.
Additional Tips
Do not have vinyl siding installed when the outdoor temperatures are below freezing. This can lead to contraction, expansion, and various other related defects. The installation process is a systematic and technical development that requires benign environmental conditions.
Do not paint vinyl siding. Not only does this void most manufacturer warranties, it can end up looking unattractive and unprofessional. Instead, consider cleaning services or overall replacement for best results.
When performing outdoor work like construction, concrete, staining, and anything else that uses heavy chemicals or dyes, it is recommended to cover any vinyl siding that is within range of these kinds of projects. It can lead to discoloration, corrosion, and more.
If you’ve been around long enough, you may remember the days when you’d have to scrub your home’s siding with a brush and a bucket of water.
Those days are a thing of the past. These days, we’ve got pressure washers, but there are a few tricks to the trade.
Following the proper steps to pressure washing siding will leave you less exhausted and your home looking like new again.
Find the Right Pressure Washer
Don’t be intimidated by the power of a pressure washer. Pressure washers are easy to operate and provide significantly more pressure than your garden hose to give your home a complete cleaning.
Choosing the right pressure washer is easy. For one-story homes, an electric pressure washer packs enough punch to get the first floor sparkling.
For two-story homes, homeowners should consider a gas-powered pressure washer to reach high, hard-to-reach spots.
Getting a pressure washer is only the first step. Follow these six additional tips for getting your vinyl siding to radiate cleanliness:
Use Pressure Washer Detergent
Don’t forget to accessorize. Soap and water is always a better cleaning combination than water alone.
Most pressure washers come with an injector to mix cleaning solutions into the jet stream.
Only use solvents that say “approved for pressure washer use” on the label. Unapproved solvents may not be environmentally sound and could eat away at critical pressure washer components.
Apply the Detergent Solution
Apply the soap mixture under low pressure with smooth, overlapping strokes. To prevent streaking, start from the bottom and work your way up. Pressure washing is a lot like painting. If you get “hose happy” and randomly spray everything, you’re bound to miss a spot.
If you have a multi-story house, you should consider using Campbell Hausfeld’s High-Pressure Soap Lance. Most pressure washers only spray soap under low pressure. The new lance sprays detergent up to 25 feet under high pressure.
Use a Pressure Washer Brush for Tough Spots
If your home hasn’t been cleaned in a while, use a rotating or utility brush to help loosen thick layers of dirt.
The brush simply snaps to then end of the pressure washer wand. Best of all, it acts as a foaming brush, emitting a soapy solution as you clean.
Let it Settle Before Rinsing
Why bother using a solution if you don’t give it time to work? It’s okay to allow the soap mixture to sit for five to 10 minutes, as long as it doesn’t dry.
Start From a Distance
Pressure washers are designed to pack a punch. If you start spraying too closely, you could damage, instead of clean, the area. Hold the wand a couple of feet from the surface and gradually move closer if additional cleaning power is needed.
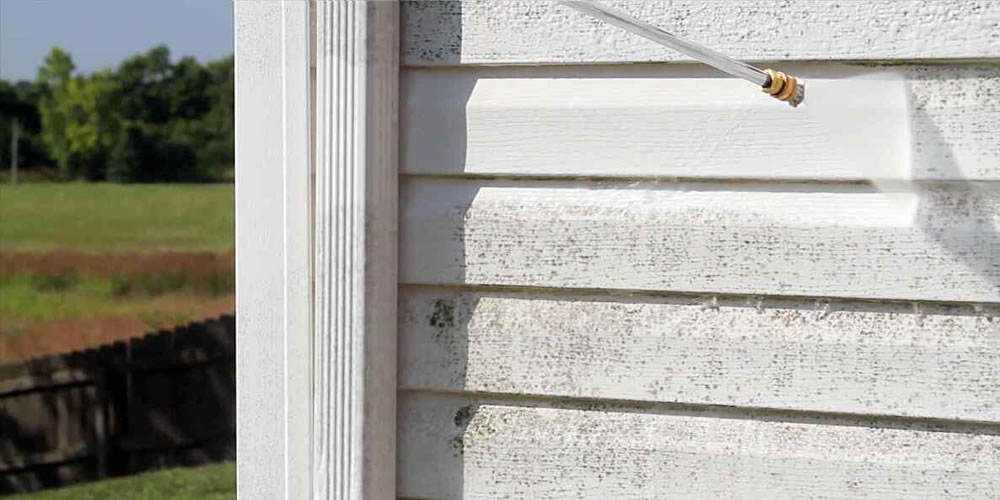
Spray Your Siding Clean
Be careful not to spray directly at eaves, vents or light fixtures. High water pressure can knock out loose windowpanes or break them. Also, keep the angle of the wand pointing down so you don’t spray up under the laps of horizontal siding. This will prevent the vinyl siding from buckling under pressure. When rinsing, start at the top and work down to ensure the entire area is soap free.
Pressure washers are a blast to use. Best of all, they work extremely fast, so you can spend more time admiring your work than actually doing it. In addition, pressure washers have lots of other handy uses around the home – from stripping paint to cleaning your deck to scrubbing your sidewalks.
Get the details right when you install vinyl siding and you’ll save yourself hours of frustration later on. These 13 simple tips will help.
Use the Wider Starter Strip
The bottom of the starter strip (the part the bottom panel hooks on to) should be at least 1 in. below the top of the foundation, but the lower the siding is installed, the better. It protects the sheathing from rain, snow and pests. Most suppliers sell two sizes of starter, 2-1/2 in. and 3-1/2 in. Spend the extra few bucks on the wider stuff and start your siding a bit lower.
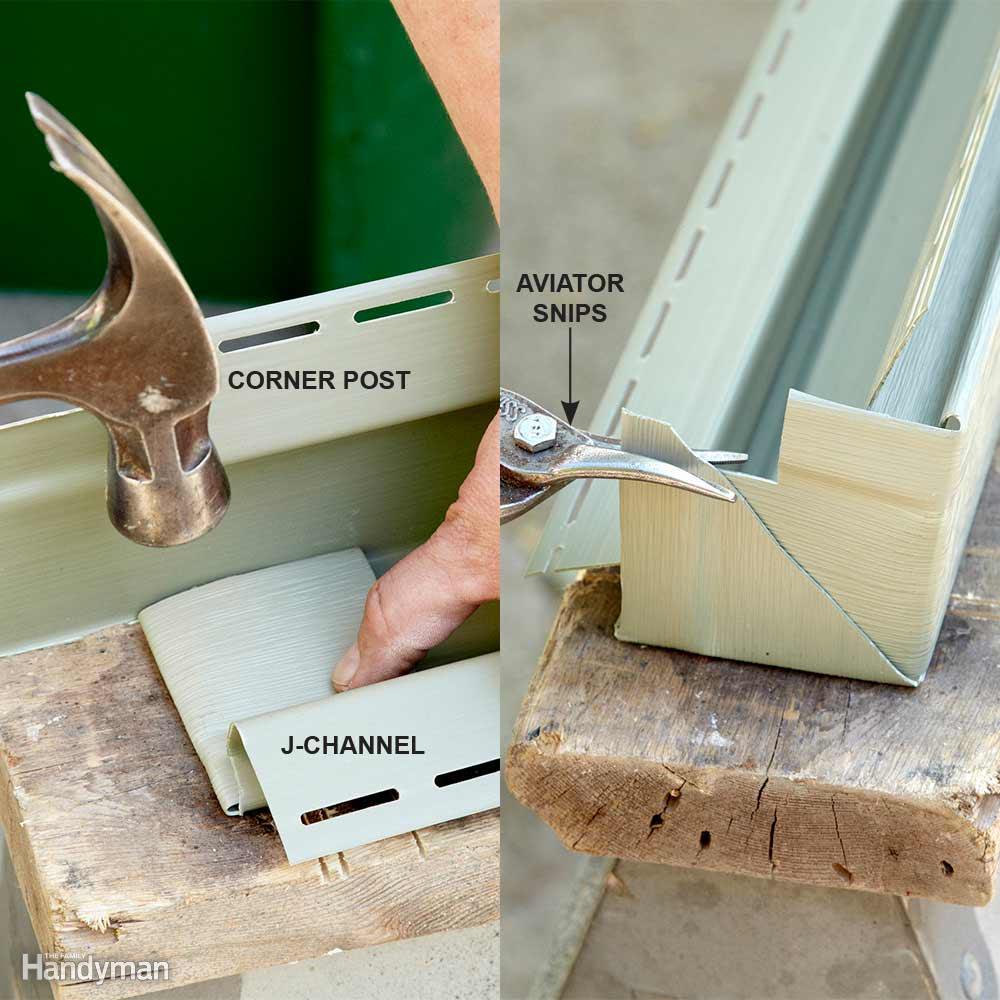
Cap the Corner Posts
Mice, bees and all sorts of other critters love making their home inside vinyl corner posts. Keep these pests out by capping each post before you install it. Start by cutting off a few inches of the J-channel portion on the post. Fold back the remaining flaps and gently tap a crease into them with your hammer. Notch the flaps so the post will fit snug up against the wall. The posts will crack if they’re not warm, so if it’s cold outside, lay them in the sun or bring them into the house before you do this.
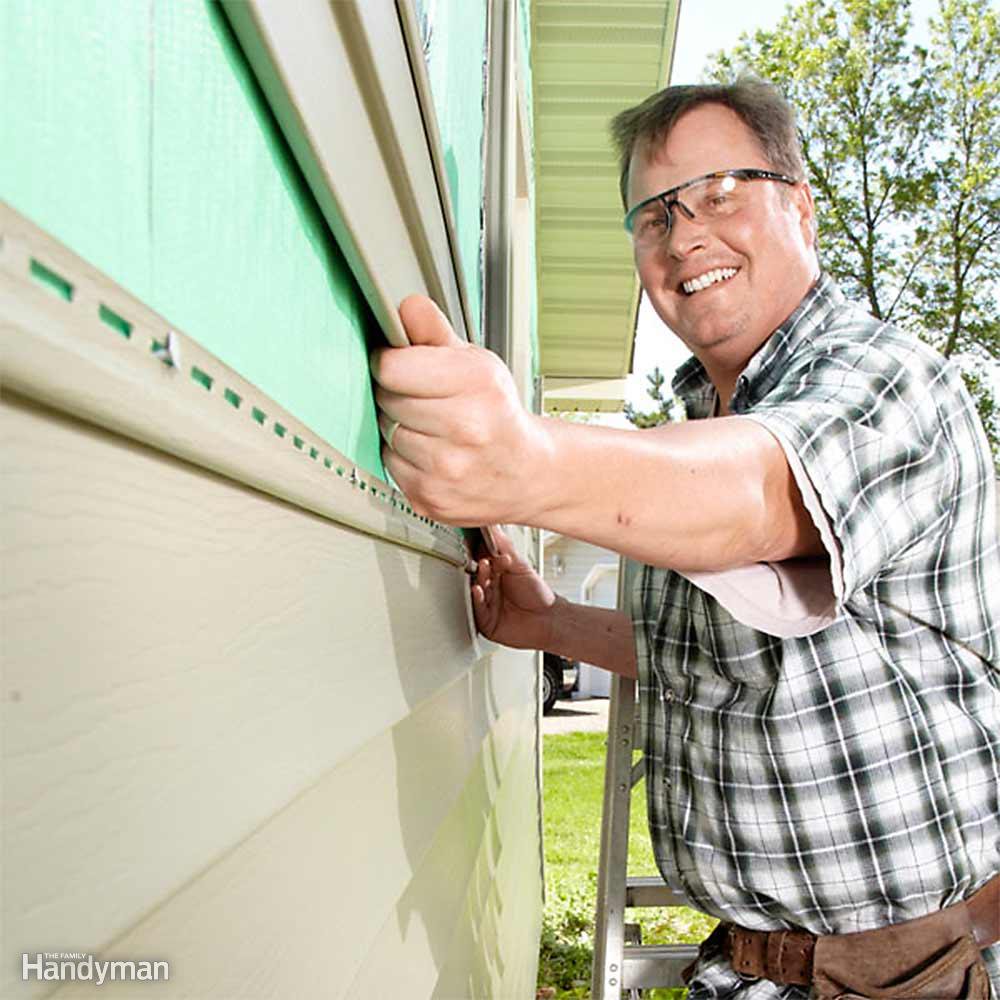
Pull Up as You Nail
Most vinyl siding failures are caused when panels unlock from each other. Once this happens, it’s only a matter of time before the wind catches them and sends them flying into the neighbor’s yard. Always apply a little upward pressure as you nail each piece; this keeps the panels locked together nice and tight. Don’t “power-lift” each piece or you’ll put too much pressure on the nailing flange, causing it to break.
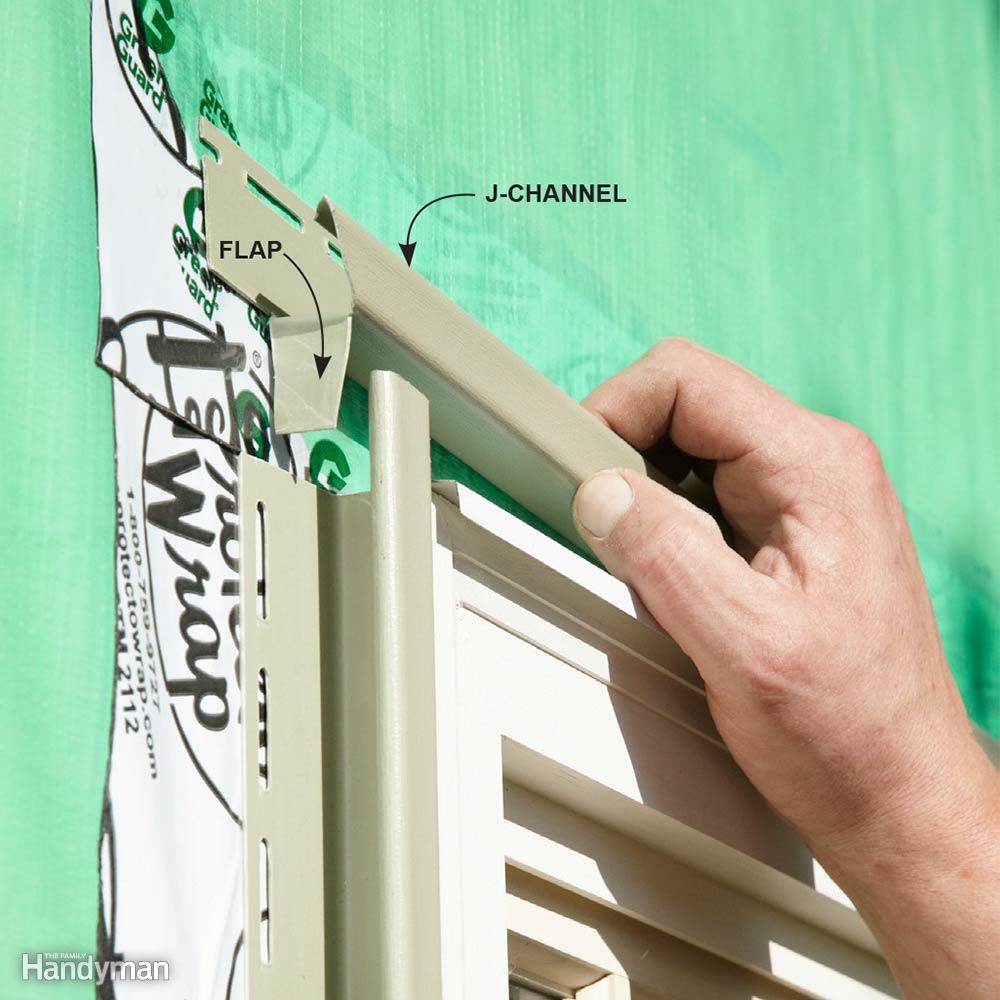
Overlap Your Top J-Channels
There’s no way to stop rainwater from getting into the J-channel that sits on the top of windows and doors. But you can stop that water from getting behind the side J-channels. Create a flap in the top J-channel that overlaps the side channels.
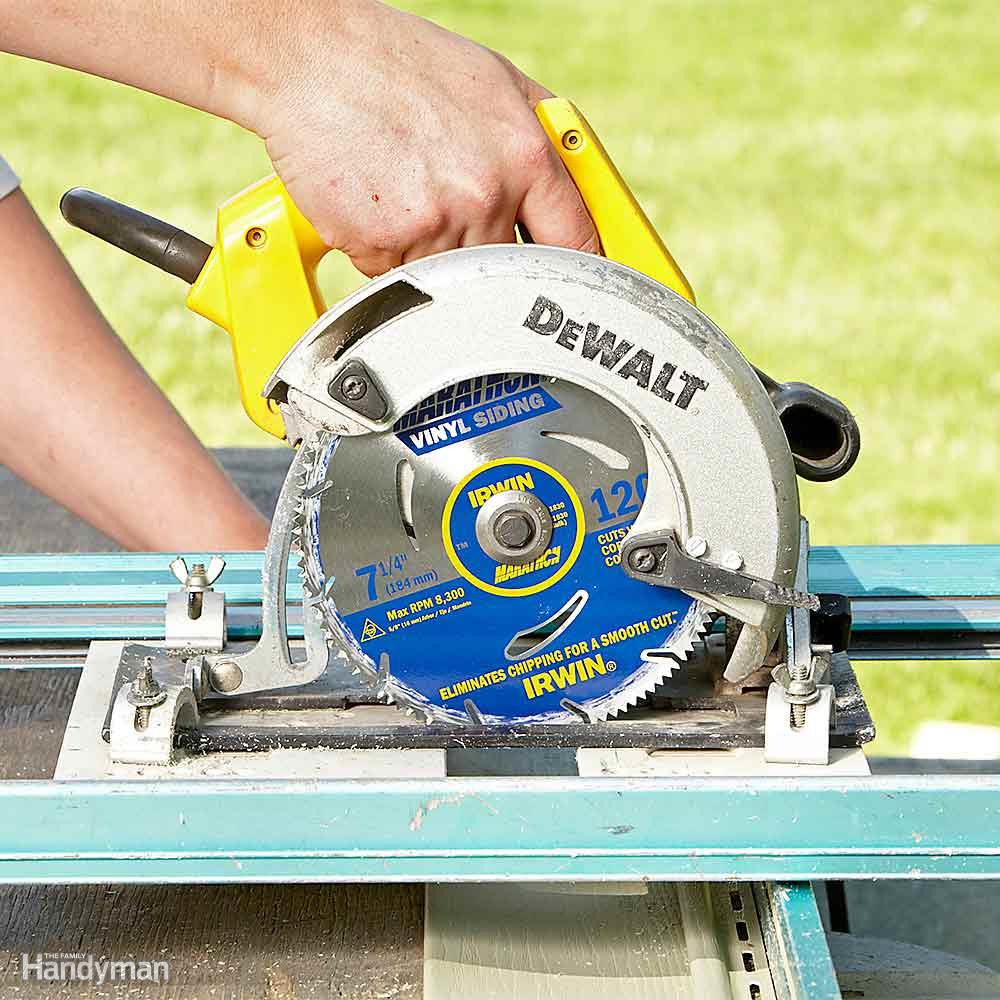
Buy a Vinyl-Siding Blade
Pushing through vinyl siding with a wood blade in your circular saw will cause the siding to shatter, which is both frustrating and dangerous. Buy a blade made to cut vinyl siding. They’re cheap and available at any home center. If you’re using a sliding miter saw, and the siding is still chipping, try slowly pulling the saw backward through the siding.
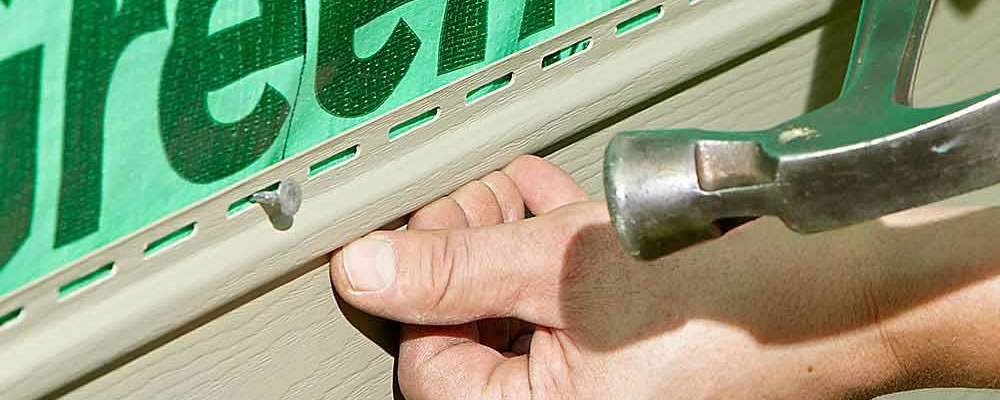
Nailing Fundamentals
Use 2-in. galvanized roofing nails unless the sheathing has foam on it. Then you’ll want longer ones. Don’t drive the nails tight: Each panel should be able to move back and forth or the siding will bubble on really hot days. Hit every stud: Expansion and contraction of the siding will loosen nails that are fastened only to the sheathing.
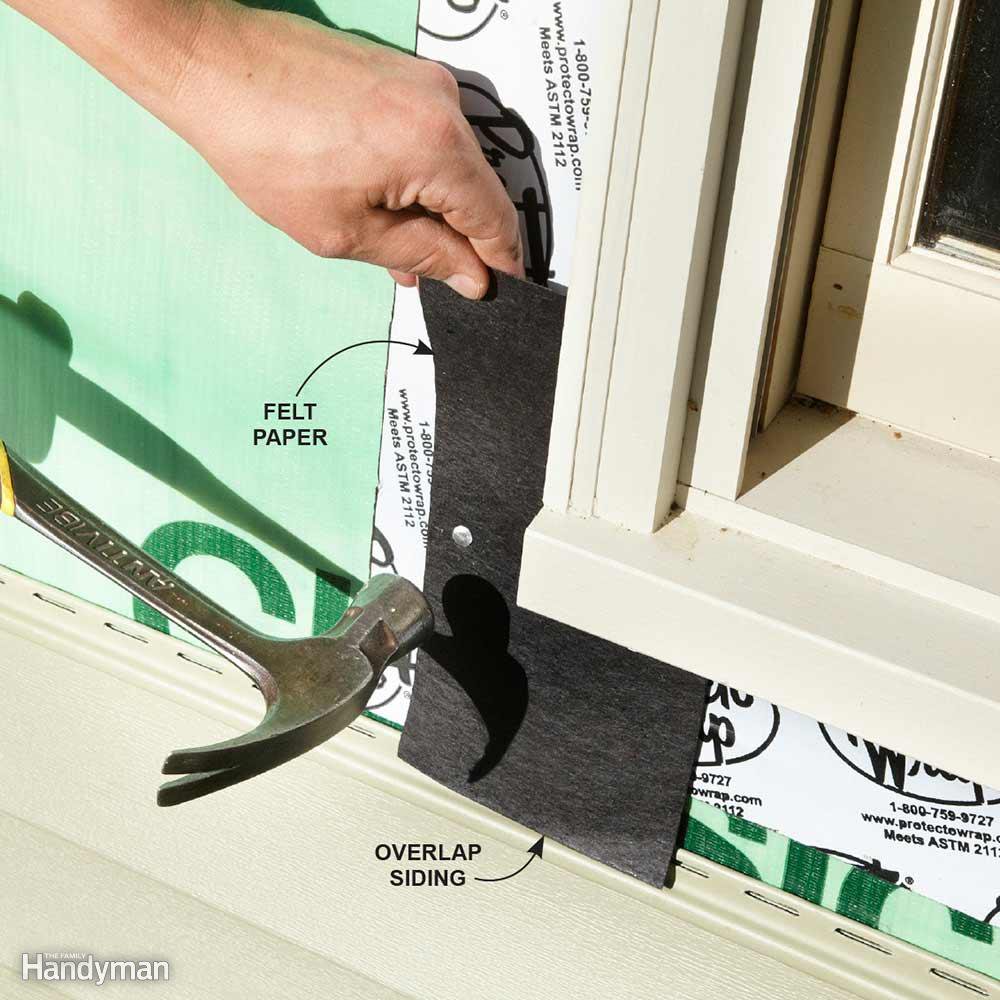
Flash the Bottoms of Windows
Cut a piece of flashing out of felt paper and install it at the bottom corners of the windows before you install the side J-channels. Overlap the flashing onto the row of siding just below the window. Now, any water that runs inside the J-channels will come out on top of the siding and out the weep holes designed for this purpose.
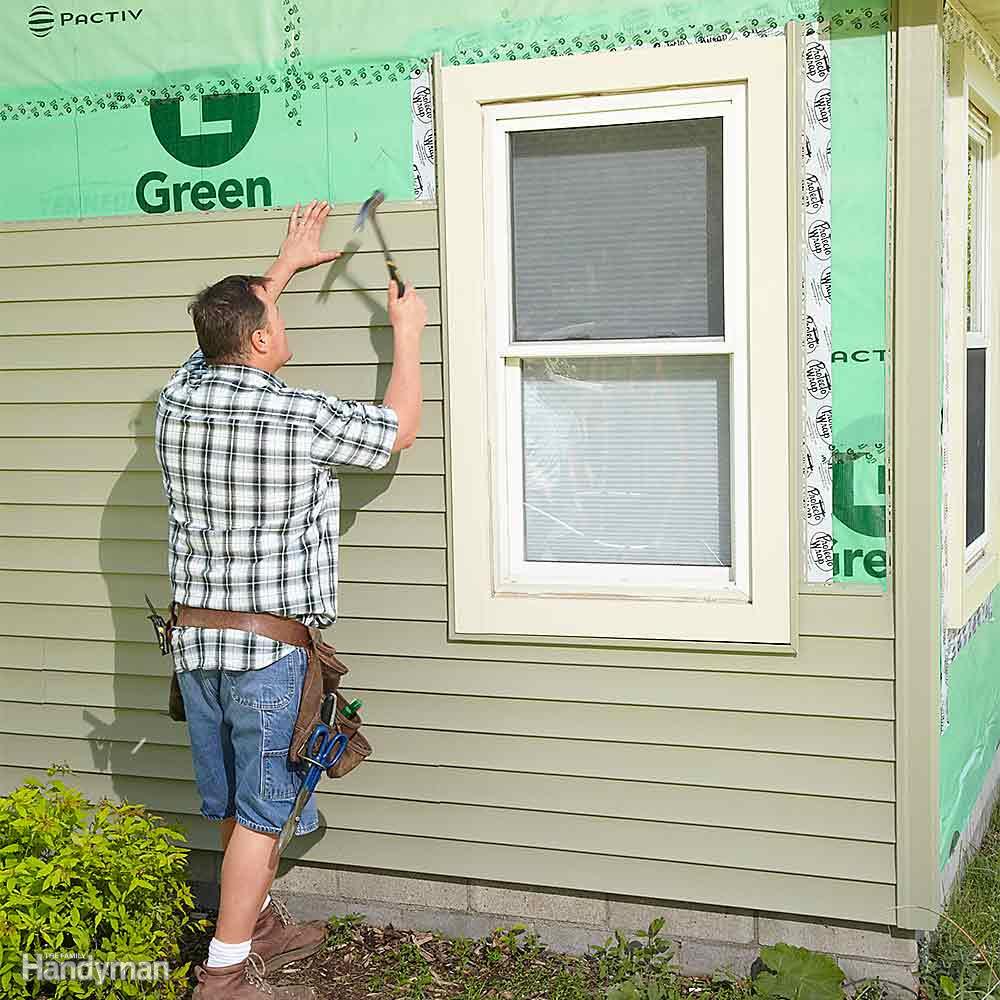
Install Longer Panels First
When installing siding on each side of a window or door, start on the side that needs the longer panels. Longer siding panels don’t stretch as readily as smaller ones, so they’re not as easy to adjust if they get out of whack. Before nailing the last couple of pieces on the small side, measure up to the top of the window to make sure both sides are at the same height.
Mind the Overlaps
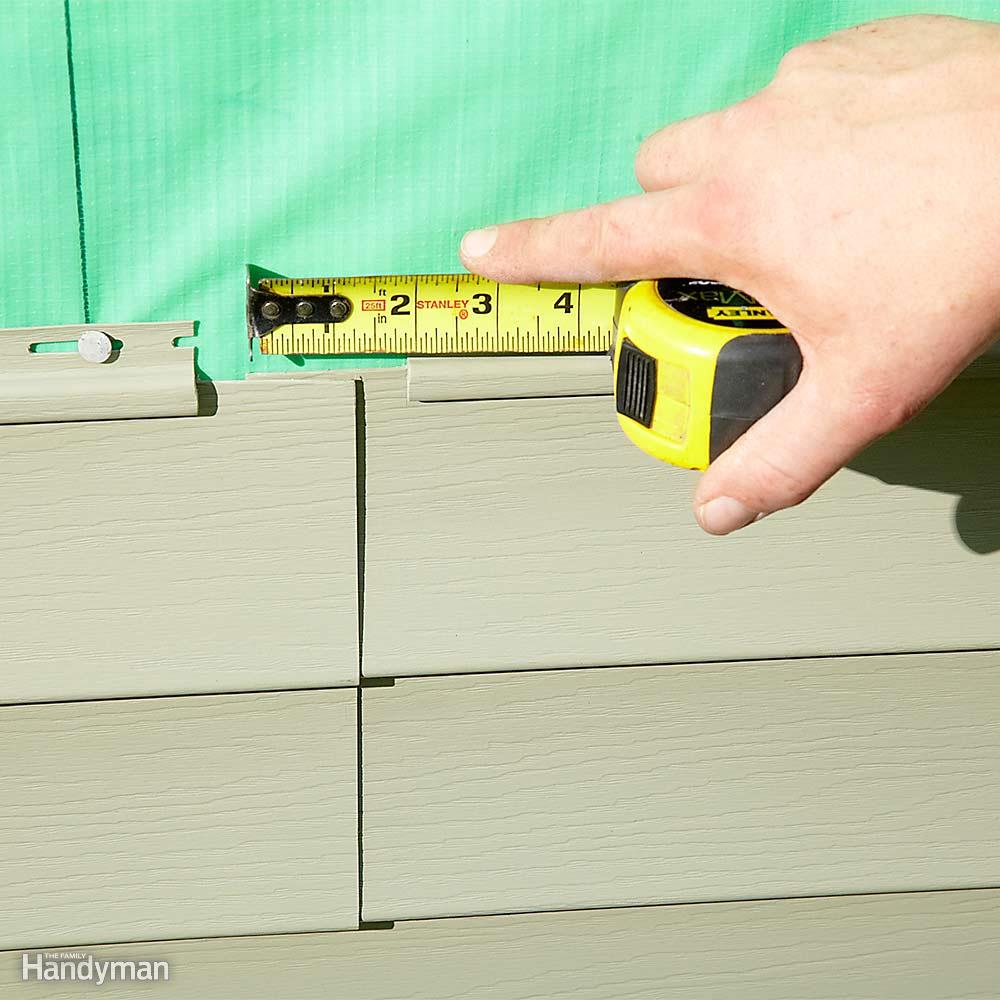
Always refer to the installation guide on the particular siding that you’re installing, but most vinyl siding panels should overlap each other by at least an inch. Add 3/8 in. on hot days because the siding will contract when the temperature drops.
On the sides of the house, start each row at the back corner so you don’t see the seams from the street. If the seams overlap away from the line of sight, they become nearly invisible. Lap them the other way and they’ll be a real eyesore.
On the front and back of the house, overlap the seams so you don’t see them from the areas where you spend the most time, like front doors, decks and patios. If the visibility of a seam doesn’t matter at all, install the siding so the prevailing winds will blow over the seams, not into them.
Don’t Trap Water Behind Corners
Corner posts above the roof-line are a notorious source of water infiltration. If a corner post is installed tight to the shingles and the J-channel dead-ends into it, any water that runs down the J-channel will back up at the post and may find its way into the house. Instead, hold the corner post up a bit and run the J-channel beneath it.
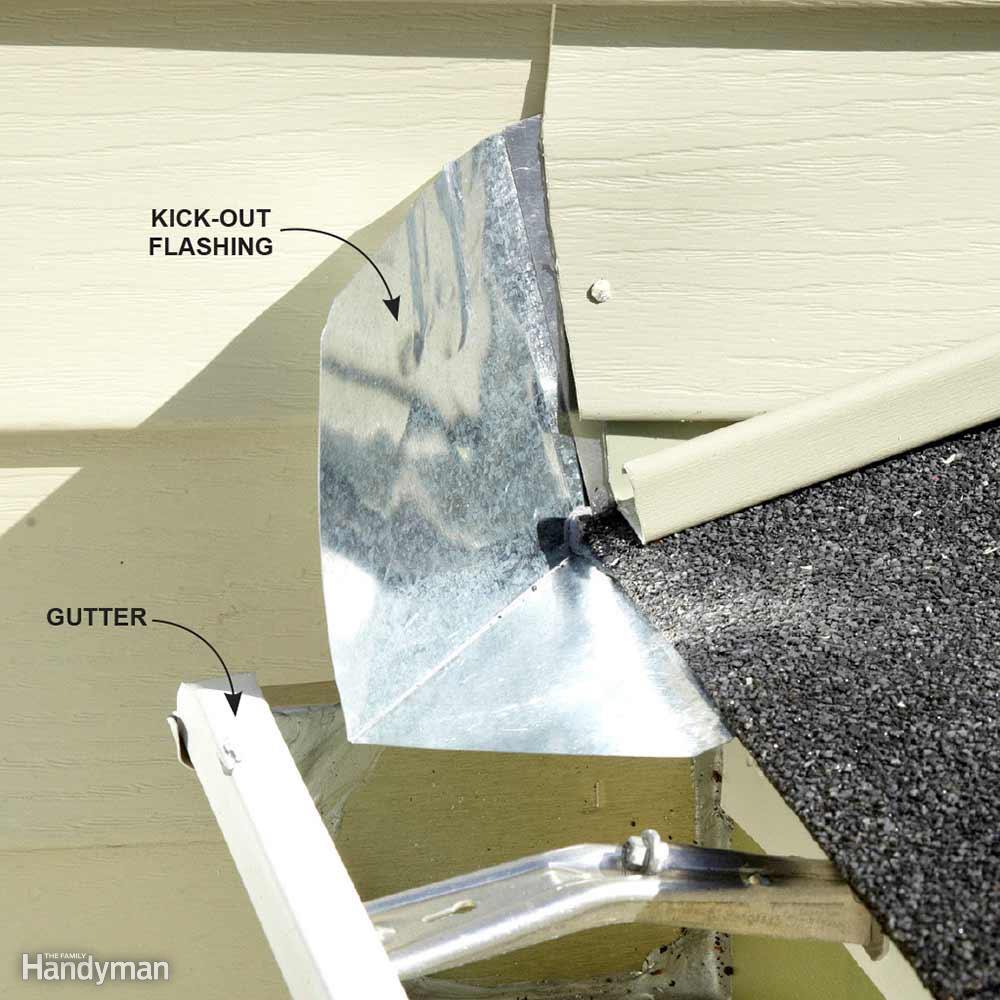
Install Kick-Out Flashing
Kick-out flashing prevents water from running down a roof and ending up behind the siding on an adjacent wall. It can be a pain to side around it, but you will fail your inspection if the inspector doesn’t see it on your job. Leave the kick-out flashing loose and slide the first panel behind the flashing. Then nail the flashing to the wall and lap the next piece over it. You may need a small trim nail to hold the siding seam tight (a little dab of caulk over the trim nail is a good idea).
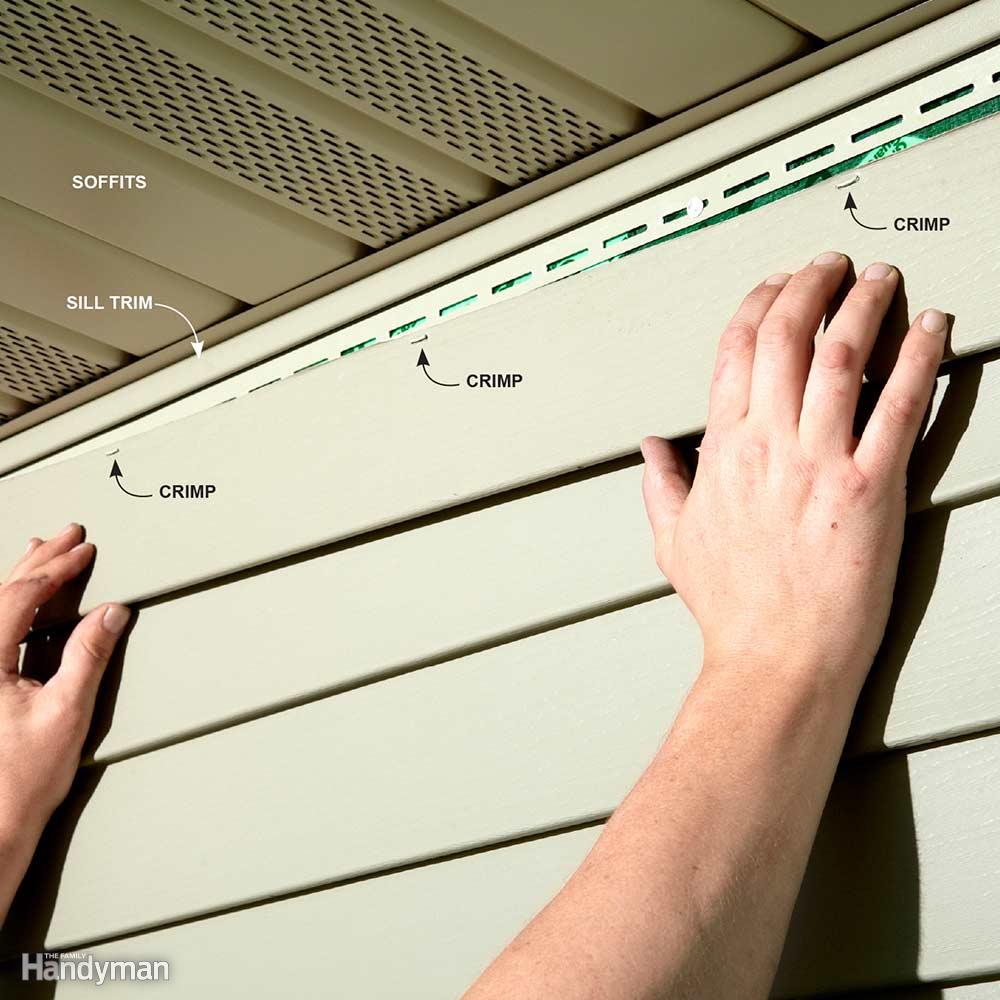
Crimp and Caulk the Top Course
Pay close attention to the area where the top row of siding meets the soffits. The most common approach here is to install sill trim at the soffits, rip down the top course of siding, and crimp the siding so the sill trim holds it in place. This works fine most of the time, but always add a few blobs of caulking inside the bottom lip of the top course for extra security. You can crimp the siding using a Malco Snap Lock Punch.
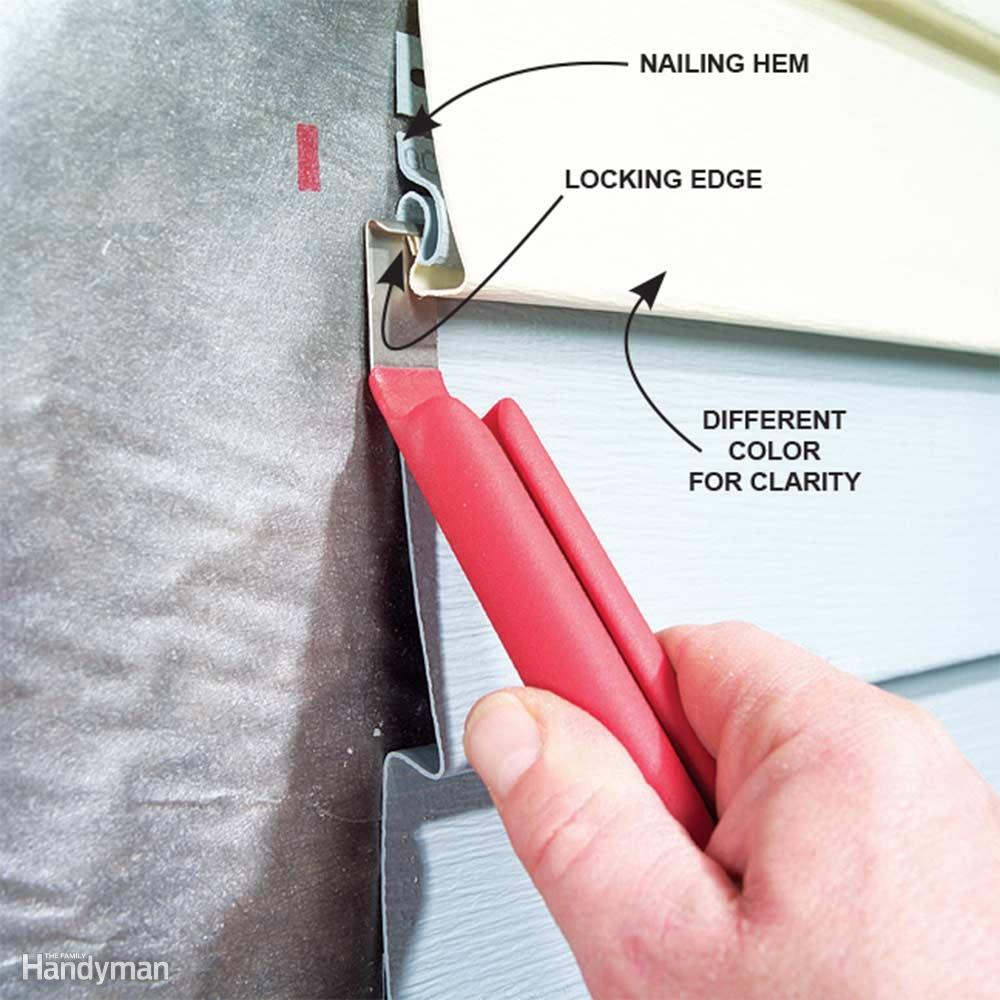
Fix Mistakes With a Zip Tool
To remove a piece of siding that’s already nailed up, slide the zip tool (available at any home center) under the butt edge of the siding, hook the locking edge and pull down. Then slide the tool horizontally along the lock to release it. Lift the unlocked siding to expose the nailing hem of the siding piece below. Draw a line on the wall along the top of each siding course before you pull the nails.


 3. Do I have a resource to turn to if I have questions?


 Use Pressure Washer Detergent
 Apply the soap mixture under low pressure with smooth, overlapping strokes. To prevent streaking, start from the bottom and work your way up. Pressure washing is a lot like painting. If you get “hose happy” and randomly spray everything, you’re bound to miss a spot.
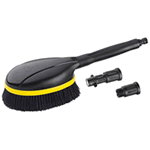 Use a Pressure Washer Brush for Tough Spots